Non-authenticated scanning involves scanning target systems without providing any credentials. In this scenario, the scanning tool can only collect information that is accessible from outside (external) the target system, such as open ports, network services, and banner information. Non-authenticated scans are typically less intrusive and can provide a quick overview of potential vulnerabilities and exposures present on the network.
Qualys non-authenticated scanning (sometimes referred to as “no authentication scan”) allows organizations to perform vulnerability assessments without the need for privileged access to target systems. While non-authenticated scans may not provide as much detail as authenticated scans, they still play a valuable role in identifying common vulnerabilities, misconfigurations, and exposures that could be exploited by attackers.
Some key points regarding non-authenticated scanning:
Non-authenticated scans are useful for quickly identifying externally visible vulnerabilities and exposures.
They can be performed without the need to manage and maintain credentials for target systems.
Non-authenticated scans may not detect all vulnerabilities, especially those related to configuration settings, missing patches, or user-specific privileges.
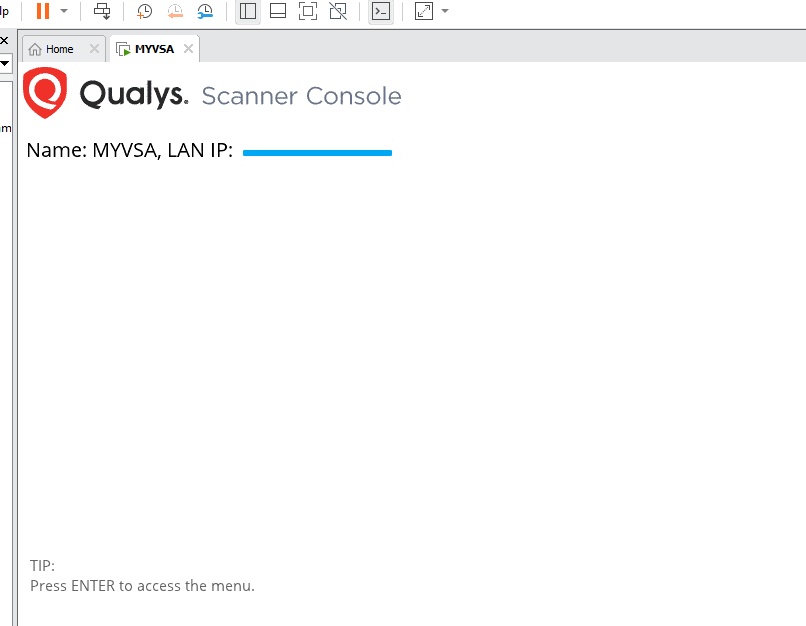
Click here for a step-by-step guide on installing and configuring Qualys Virtual Scanner. Once your virtual Appliance is ready as shown in the screenshots below, let’s proceed with the scanning.

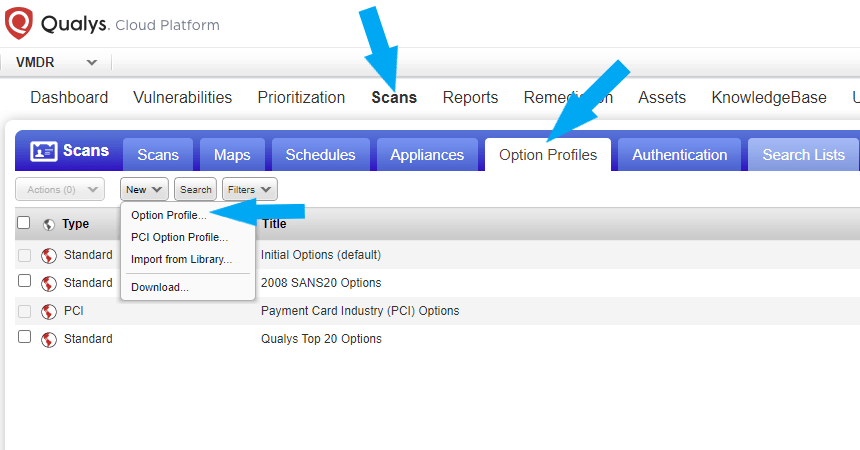
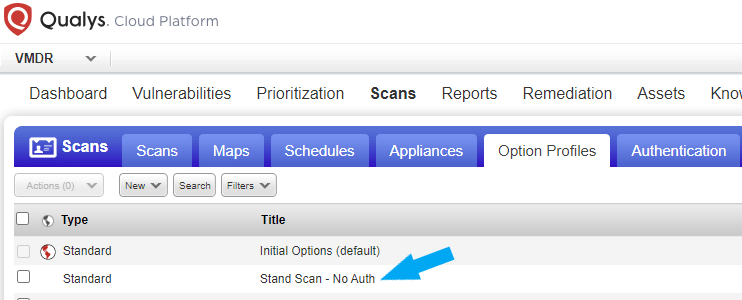
We need to create an Option Profile. Click on the scans tab > Option Profiles > New > Option Profiles.
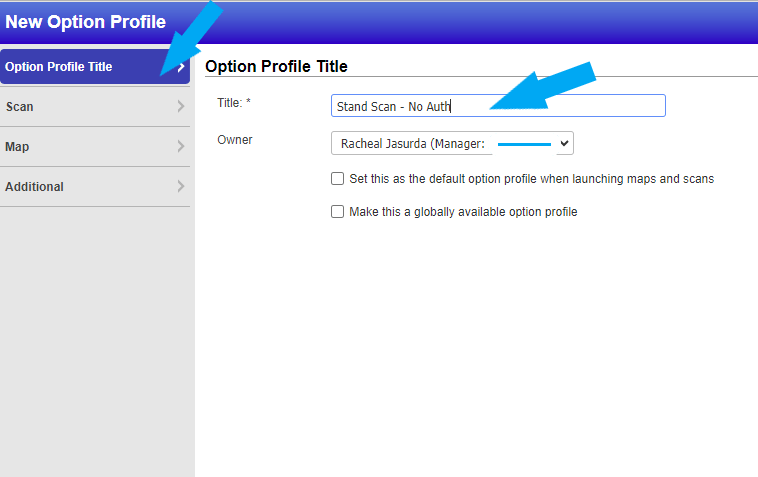
Name your new Option Profiles
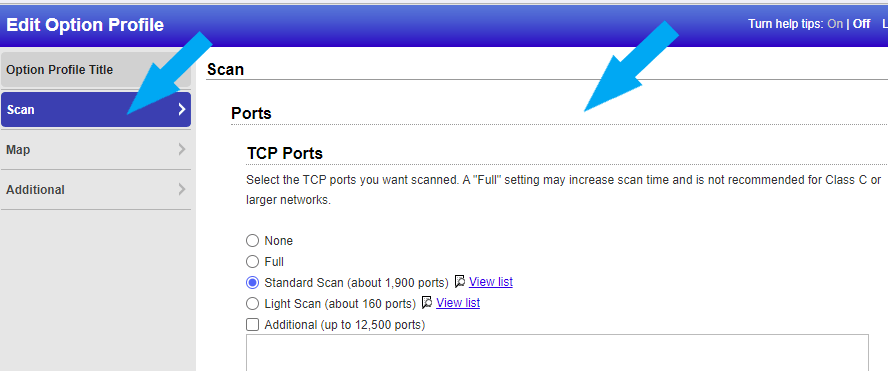
Click on Scan, for this example we are leaving it as default as this is a basic Non-authentication scan. Click the save button.
We have successfully created an Option Profiles
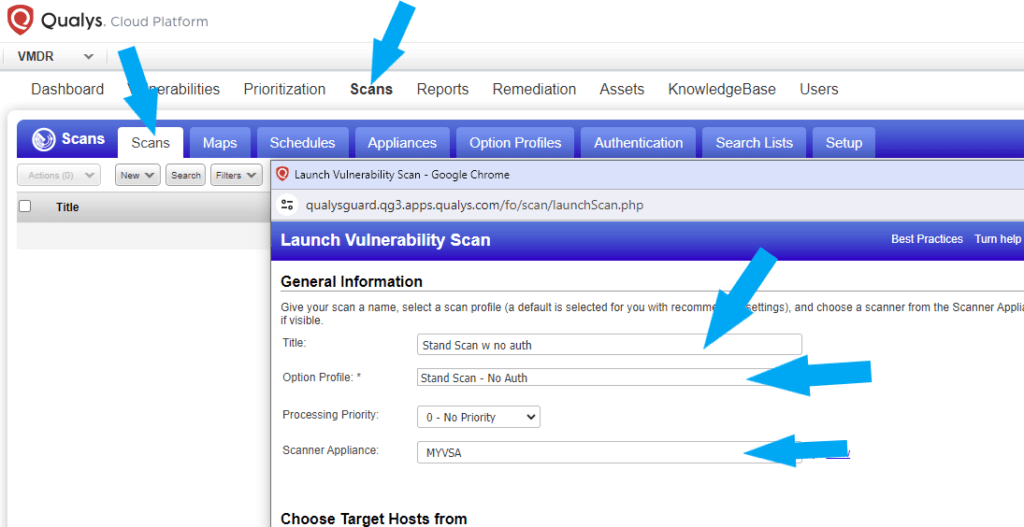
Next, we are going to create a new Scan. To do this, click the Scans tab > Scans > New > Scan. Give your new scan a Title, Select the Option Profiles created, leave the Processing Priority as 0, and choose the Virtual Scanner Appliance created.
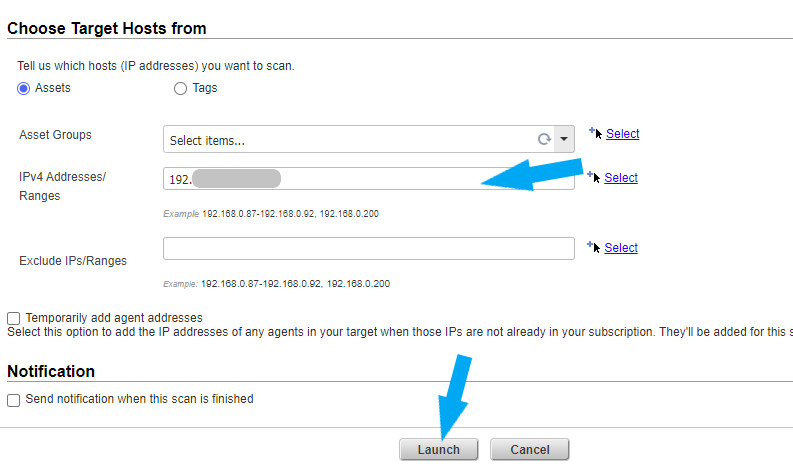
Choose your Target Host. You can choose an Asset Group, see how to create an Asset Group here. For this example, I am scanning a specific IP address of a Windows 10 virtual machine I made Vulnerable. See how to make a vulnerable machine here.
Note: Before you launch the scan, ensure your target host IP address (es) is in the same range as the IP address of your virtual appliance. Turn the firewall off on your target host. For this example, my target host is Windows 10 and Windows Defender is turned off. See how to turn Windows Defender off here. Click the Launch button.
The Scan was completed successfully. You should see similar to the screenshot below.

The scan was completed successfully, let’s review the Scan Result. Click here for How to Analyze Qualys Scan Result.
