What is Metasploitable3?
Metasploitable3 by Rapid7 is a virtual machine that is intentionally built to contain many security weaknesses and misconfigurations and serves as a valuable tool for cybersecurity education and training. Allowing us to use it as a target for practicing hacking and penetration testing in a controlled and safe environment. Now that you understand what Metasploitable3 is let’s proceed with the installation.
In this lab, we are going to install Metasploitable3 VM in VMware Workstation using Vagrant on the Windows Operating System.
The essence of this lab is for you to have a safe and controlled lab environment where you can practice hacking and penetration testing.
Important! Please do not scan systems that do not belong to you or have legal permission to scan.
Click here to download Vagrant. Scroll down to Windows and download based on the version of your Windows Operating System. 32-bit or 64-bit versions. For this example, I am using a 64-bit Windows version.

Locate your downloaded Vagrant Installer in File Explorer. Double-click it to run, check the box next to I accept the terms in the license agreement and click on the Install button to install Vagrant.

Vagrant requires you to reboot your system after installation. Ensure to reboot your system on the prompt to reboot.
Once rebooted, open your Windows command prompt. Using the following commands, install the vbguest plugins and Vagrant Reload.
vagrant plugin install vagrant-reloadvagrant plugin install vagrant-vbguest
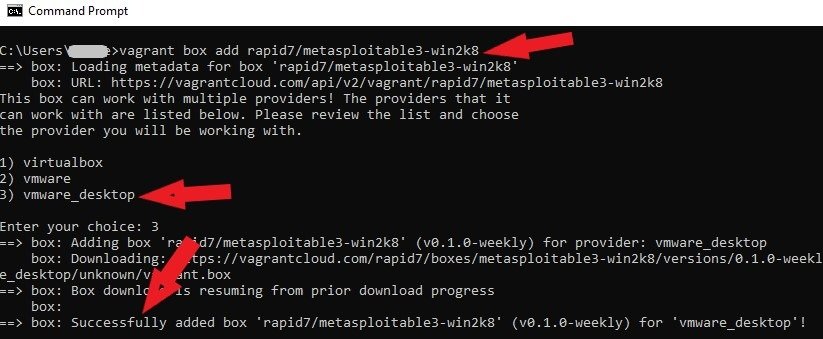
Type this command vagrant box add rapid7/metasploitable3-win2k8 and press enter to add the Metasploitable3 Windows Server
2008 version to your system using Vagrant.
vagrant box add rapid7/metasploitable3-win2k8Choose option 3 to use the VMware Workstation. Vagrant will go ahead and download the Windows version of Metasploitable3 from its online repository to your system.
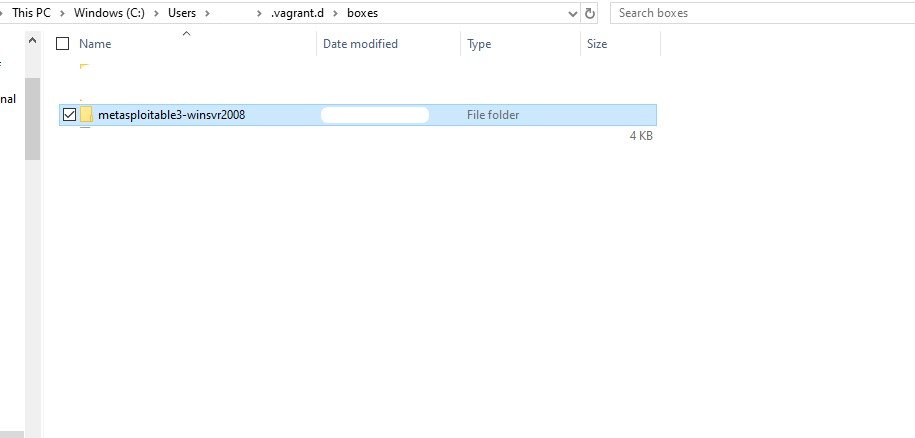
Open Windows Explorer, and locate the downloaded box at C:\Users\username.vagrant.d\boxes. Change the name of the folder from rapid7-
VAGRANTSLASH-metasploitable3-win2k8 to metasploitable3-winsvr2008.
Change your working directory to the location of the folder Metasploitable3 was downloaded.
On your Windows Command Prompt, type cd .vagrant.d\boxes. Next, type vagrant init metasploitable3-winsvr2008 and press enter to start the initialization process.
cd .vagrant.d\boxesvagrant init metasploitable3-winsvr2008Tips: If you receive this error “Vagrantfile already exists in this directory.” Remove it before running vagrant init. Run this command “vagrant init rapid7/vagrant initmetasploitable3-winsvr2008 –force” to override the existing vagrant. vagrant init {BOX_NAME} –force
vagrant init rapid7/vagrant initmetasploitable3-winsvr2008 --force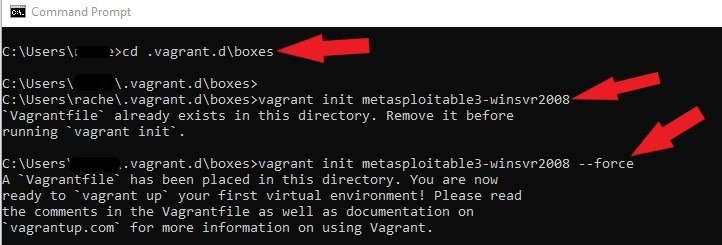
Type vagrant up and press enter.
Upon successfully completing the setup process, Import the Windows Version of Metasploitable3 into your Vmware Workstation. Rename your new Metasploitable3 Virtual Machine for easy identification. The default username and password are vagrant. Click here to learn more about Metasploitable3’s security vulnerabilities.
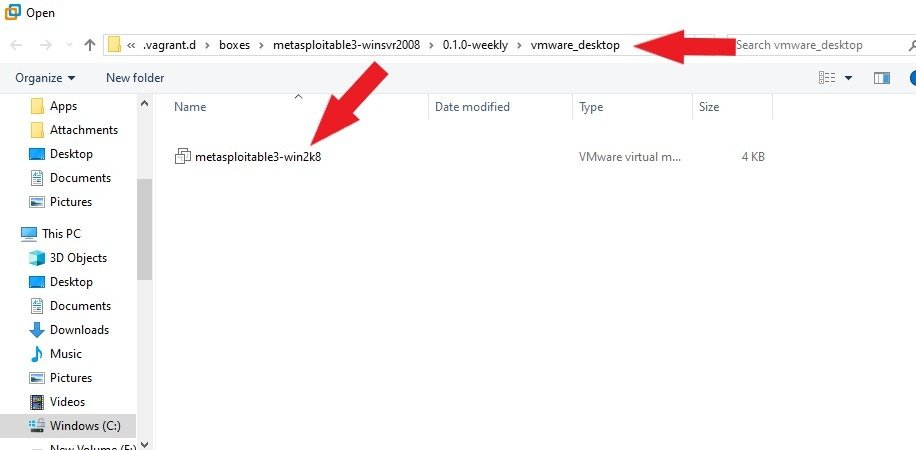
The metasploitable3 installation was successful, and now you can log in to your new Windows Server 2008 Vulnerable machine with the default username and password.
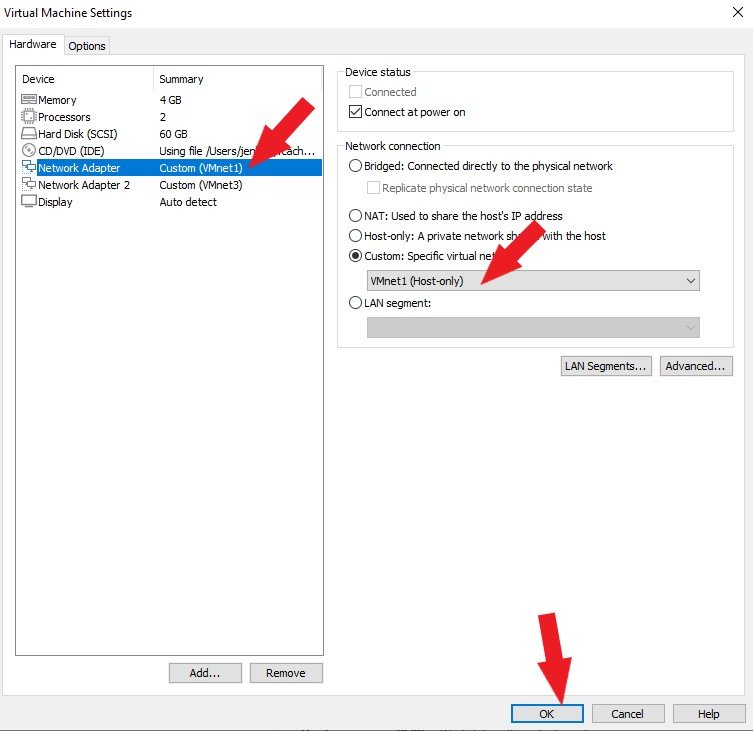
Next, let’s configure networking for Metasploitable3. We need 2 Network Adapters. You can create a second Network Adapter in your VM settings by following these steps. Set the first Network Adapter to Host Only, as shown below, and click the OK button.
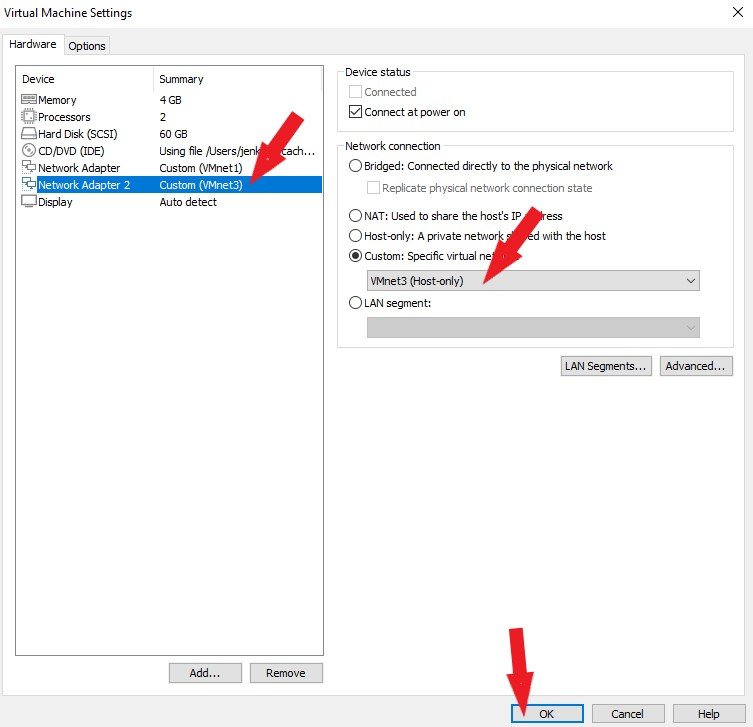
Set the Network Adapter2 to Host Only, as shown below, and click the OK button.
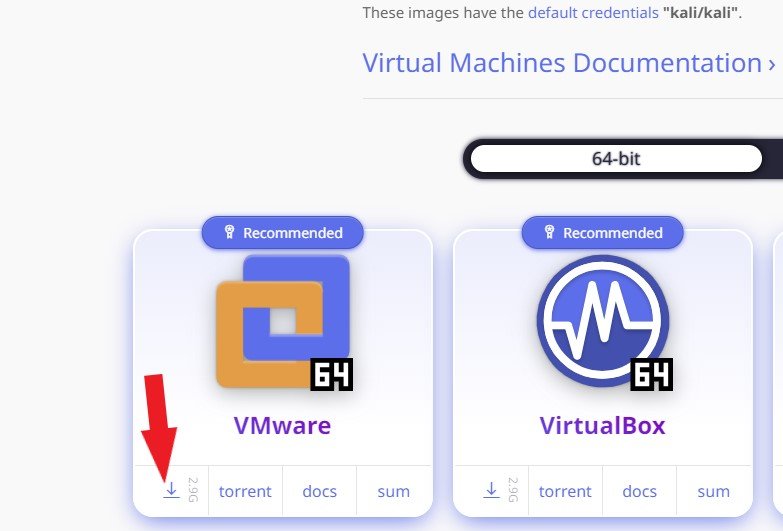
Next, we are going to download the Kali Linux virtual Machine. Click here to download the Kali Linux virtual machine from the official Kali website. Download the Vmware option.
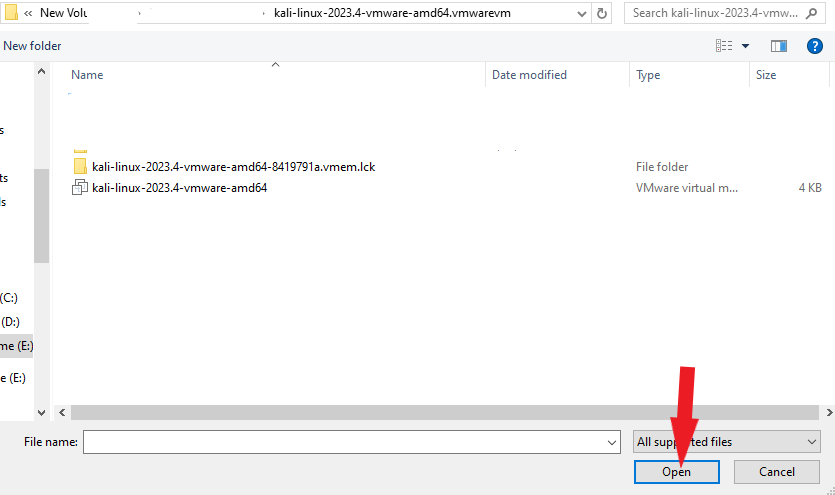
Once the download is successful, the next step is to import your new Kali Linux VM into your VMware Workstation. Open VMware Workstation, click File > Open.

Locate the Kali VM you downloaded on your system. Click on the VM file and click the Open button, as shown below.
Next, let’s configure networking for Kali Linux. We need 2 Network Adapters. You can create a second Network Adapter in your VM settings by following these steps. Set the first Network Adapter to NAT as shown below and click the OK button.
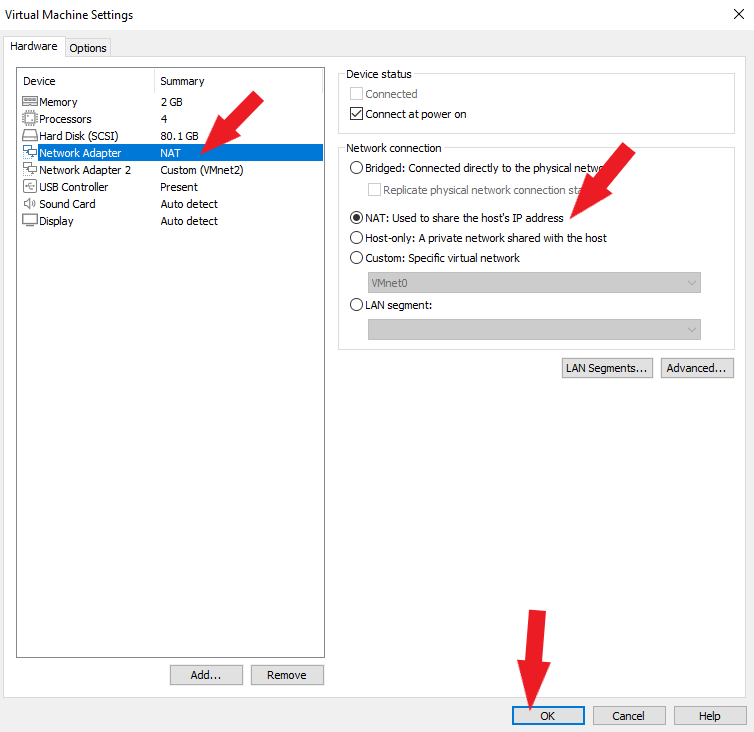
Set the Network Adapter2 to Host Only, as shown below, and click the OK button.
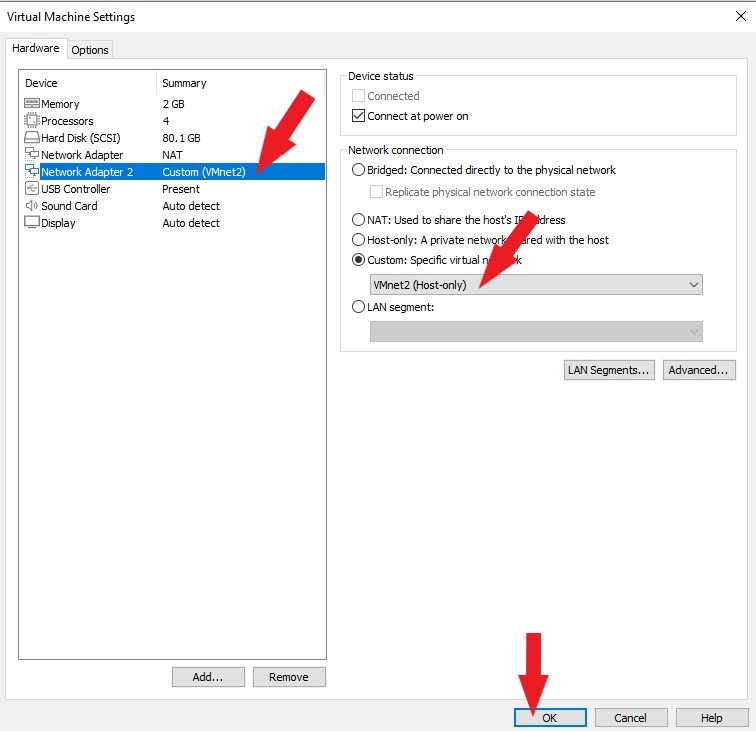
Start your machines and log in. The default credentials for Kali Linux are username: kali and password: kali. The default credentials for Metasploitable3 are Username: vagrant and Password: vagrant.
Important! Please do not scan systems that do not belong to you or have legal permission to scan.
Now, you have a new Windows Server 2008 Vulnerable machine that you can scan as a target and Kali Linux as your attacking machine for your ethical hacking practice. Open the command prompt. Type ipconfig and hit enter to find your IP address.
ipconfig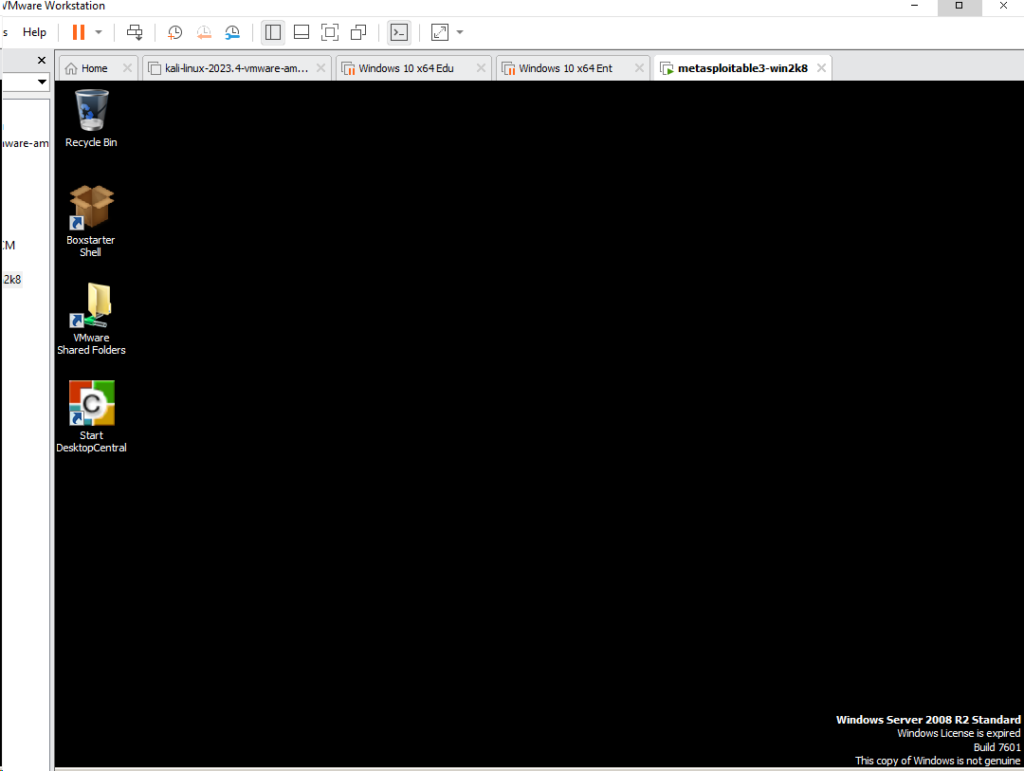
Open the terminal on your Kali Linux machine, type ifconfig, and hit enter to find your IP address.
ifconfig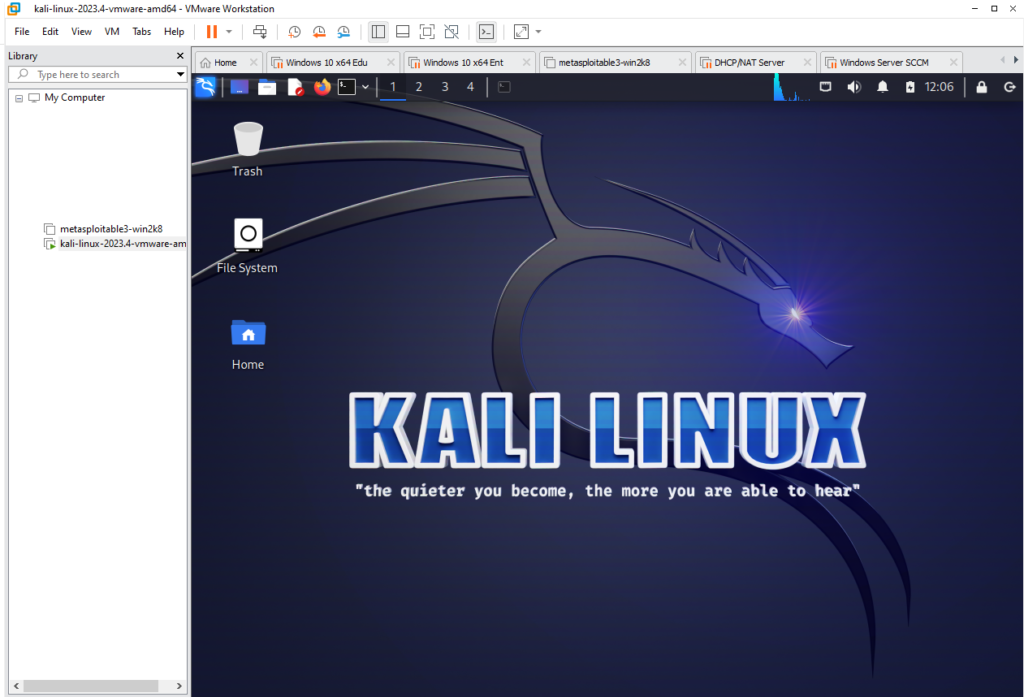
Click here to learn How to perform Vulnerability Scanning using Nmap. Scanning our newly created Metasploitable3 VM as the target.
