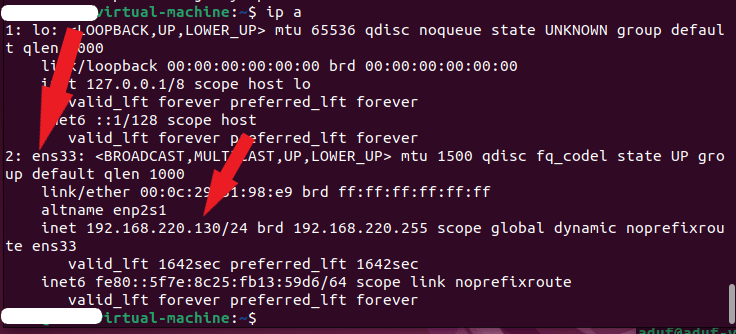
First, find out your dynamic Ip address assigned by the DHCP. To do this, open the terminal, type ip -a and press enter. This gives you the information as shown in the screenshot below.
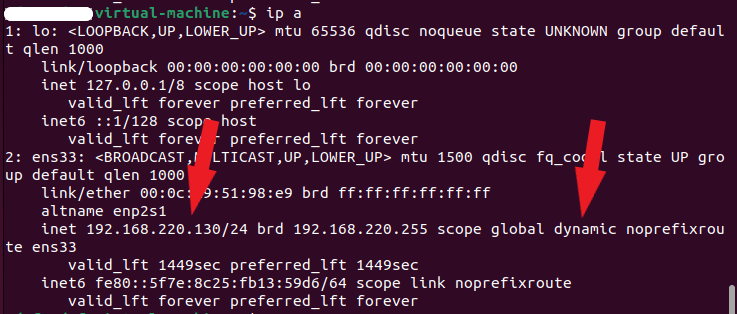
Click the Networking icon by the top left. Click Setting > Network, and click the setting icon next to the Connected -100Mb/s under the Wired.

Click the ipv4 tab. Change the IPv4 Method from Automatic(DHCP) to Manual
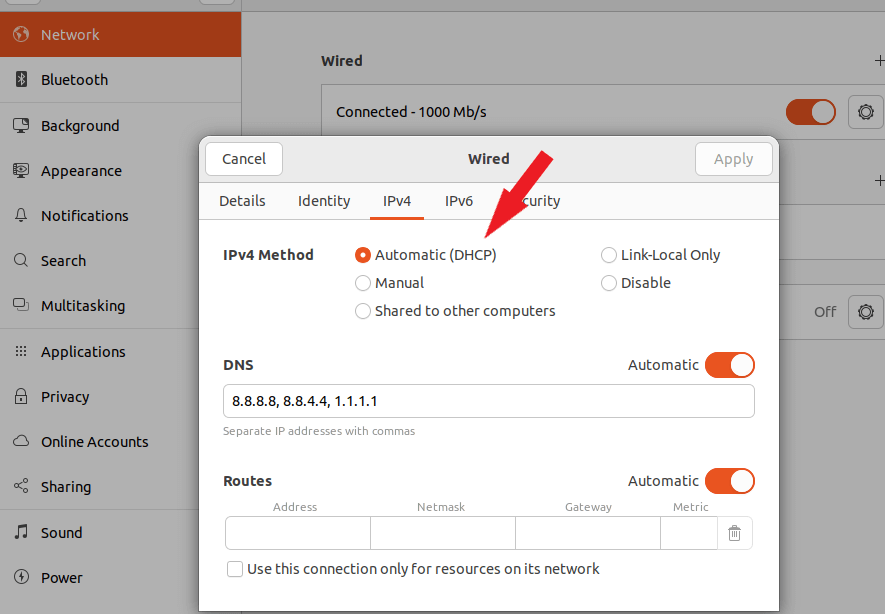
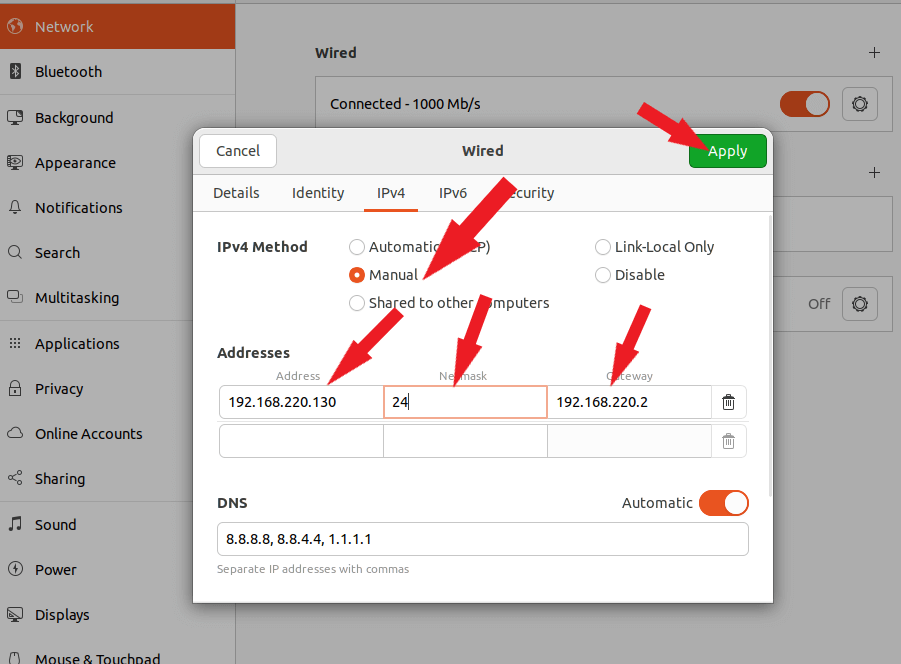
Enter your IP address, Netmask, Gateway, and DNS Server as shown in the screenshot below. You can use the Ip address noted earlier or use a new Ip address. Click the Apply button to save the changes. Toggle the button next to the Connected -100Mb/s under the Wired to turn it off and turn it back on.
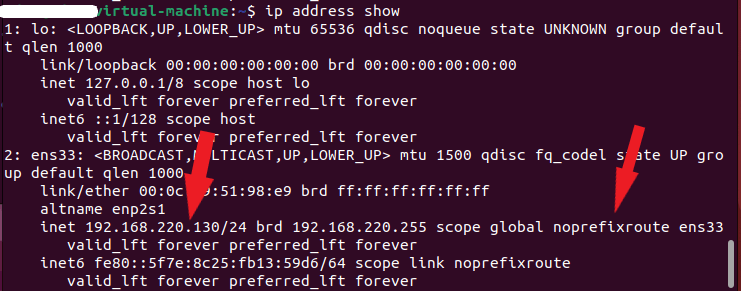
To confirm the setting has been applied successfully, open your terminal. Type IP address show or ip -a. The scope global has changed from dynamic to noprefixroute.
Setting static IP address in Ubuntu 22.04 using the command line.
Open your terminal, type ip -a and press enter. Take note of your ens33 of your machine
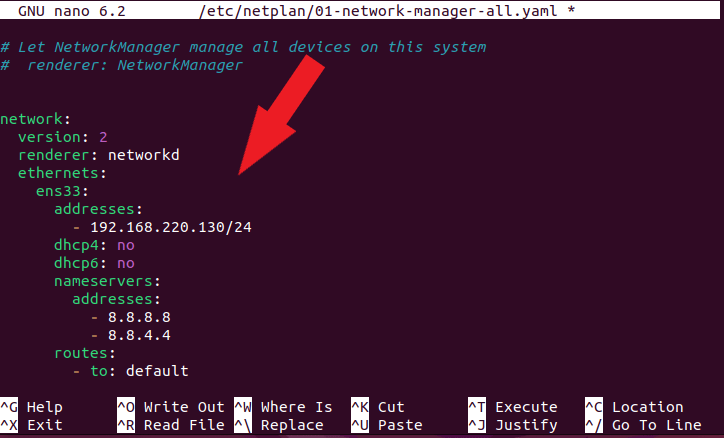
In this version of Ubuntu, network-manager uses the YAML backend that is based on libnetplan. We need to edit /etc/netplan/01-network-manager-all.yaml to do this. Open your terminal, type sudo nano /etc/netplan/01-network-manager-all.yaml, and press enter. Enter your sudo password.

network:
  version: 2
  renderer: networked
  ethernet:
    ens33:
      addresses:
         – 192.xxx.xx.xx/xx
      dhcp4: no
      dhcp6: no
      nameservers:
        addresses:
          – 8.8.8.8
          – 8.8.4.4
       routes:
         – to: default
Click here to check if your command is a valid YAML. Copy and paste your command in and click the Go button as shown in the screenshot below.
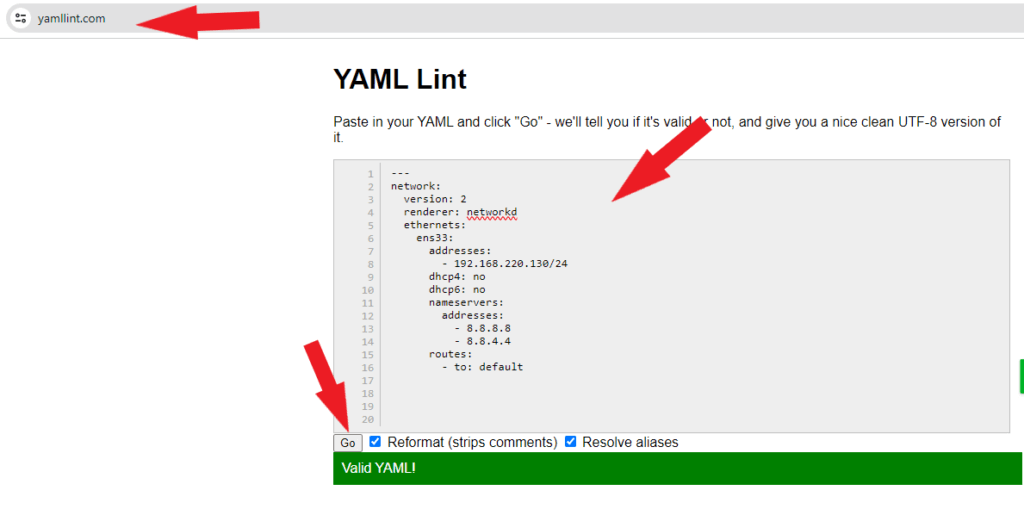
Paste your command in as shown below. Press ctrl x to exit and save
Another way you can check to make sure you have a valid YAML is by typing netplan generate and pressing enter after saving the command.
Now type sudo netplan apply to apply the rule.
Type ip -a or ip address show and press enter to confirm the changes.

