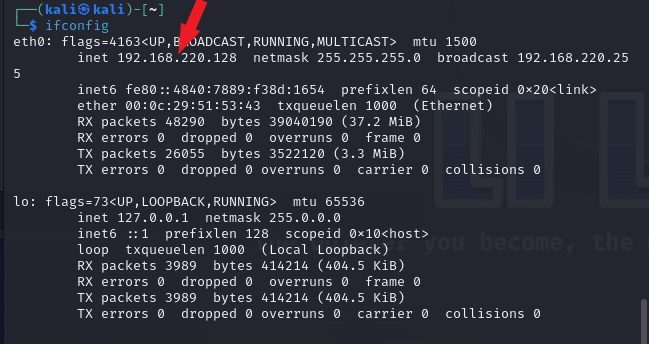
First, find out your dynamic Ip address assigned by the DHCP. To do this, open the terminal, type ifconfig and press enter. This gives you the information as shown in the screenshot below. Note the eth0 detail.
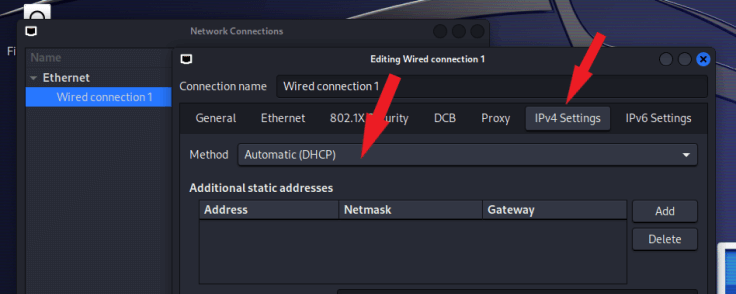
To set a static IP address using GUI, click the application icon and start typing in the word “network”. Click on “Advanced Network Configuration“

Click the ipv4 Setting tab. Change the Method from Automatic(DHCP) to Manual
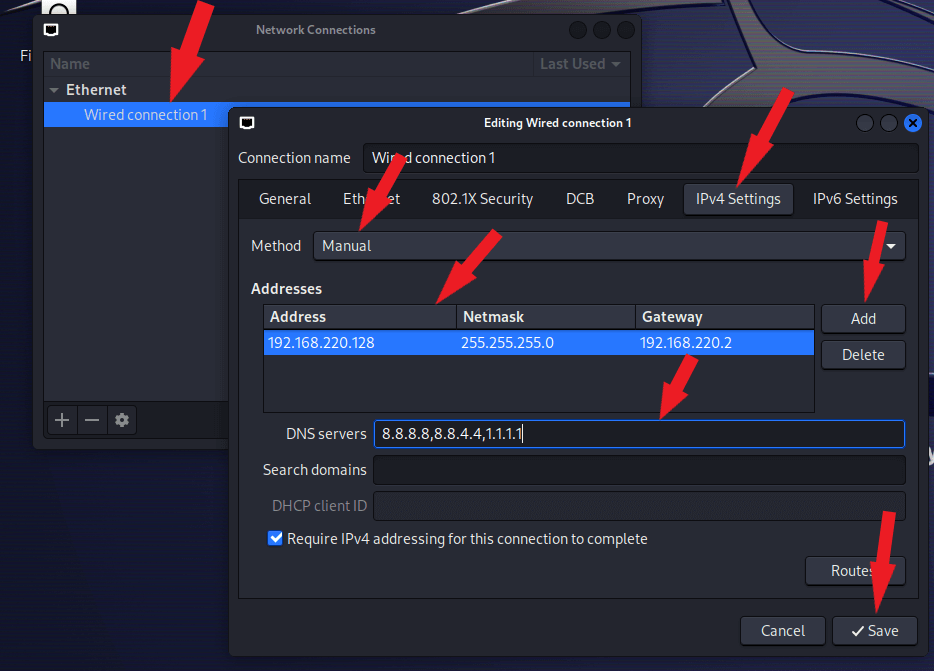
Enter your IP address, Netmask, Gateway, and DNS Server as shown in the screenshot below. You can use the Ip address noted earlier or use a new Ip address. Click the Save button to save the changes.
Open your terminal, type ifconfig and press enter. Take note of your eth0 detail.

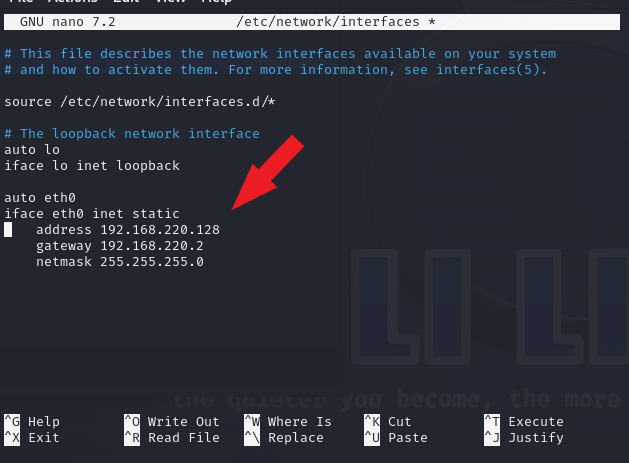
Set a static IP address in Kali Linux using the terminal. We need to use the nano command to edit /etc/network/interfaces to do this. Open your terminal, type sudo nano /etc/network/interfaces and press enter. As shown in the screenshot below, edit the file with your IP address, gateway, and netmask.

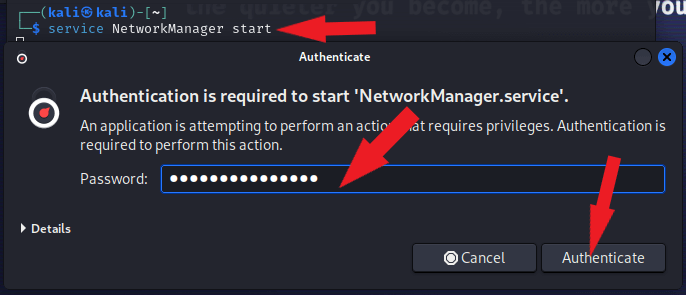
A pop-up appears, asking you to authenticate to start ‘NetworkManager.service’. Enter your sudo password and click the Authenticate button.
Now type sudo systemctl restart networking.service and press enter to restart the service. Type ifconfig and press enter to confirm the changes.
