Table Of Contents
How to Install Snort in PfSense: A Step-by-Step Guide
If you are looking to improve the security of your network, Snort, one of the most popular open-source Intrusion Detection and Prevention Systems (IDPS), can be an essential tool. PfSense, a robust open-source firewall and router platform, allows you to install Snort easily to monitor network traffic and detect malicious activity. In this guide, I will walk you through the process of installing Snort on PfSense and configuring it to provide enhanced protection for your network.
What is Snort, and Why Use It?
Snort is a powerful Network Intrusion Detection and Prevention System (NIDPS) that analyzes network traffic in real-time. It can help detect various types of attacks, such as buffer overflows, port scans, and denial of service (DoS) attacks. Integrating Snort with pfSense adds an additional layer of defense, giving you the ability to actively monitor and mitigate security threats on your network.
Why pfSense?
pfSense is a highly versatile, open-source firewall solution. It’s known for its ease of use, flexibility, and robust feature set. By installing Snort on pfSense, you combine the power of an enterprise-grade firewall with the capability to monitor for intrusions effectively.
Prerequisites
Before you begin, make sure you meet the following prerequisites:
- You should have pfSense already set up and running on your network.
- You need administrator rights to install packages and configure pfSense.
- Internet access is needed to download the Snort package and any necessary updates.
Install the Snort Package on pfSense
Open a web browser and log in to the pfSense dashboard using your admin credentials. On the top menu, click on System > Package Manager.

Click on Available Packages. In the search bar, type Snort and hit enter. Once you find the Snort package in the search results, click the + Install button next to it.

Confirm the installation by clicking the confirm button when prompted. The installation process may take a few minutes. Once complete, the Snort package will be available in pfSense.

Configure Snort Interface Settings
After the Snort package is installed, you need to configure the interfaces where Snort will monitor network traffic.
Navigate to Services > Snort in the pfSense menu.

Click on Global Settings. Enable Snort rules based on your needs. I will enable Snort VRT, Snort GPLv2, and ET Open for this example. Check the boxes to enable Snort VRT, Snort GPLv2, and ET Open. To get your Snort Oinkmaster Code, You need to create an account with Snort. Click here to register.

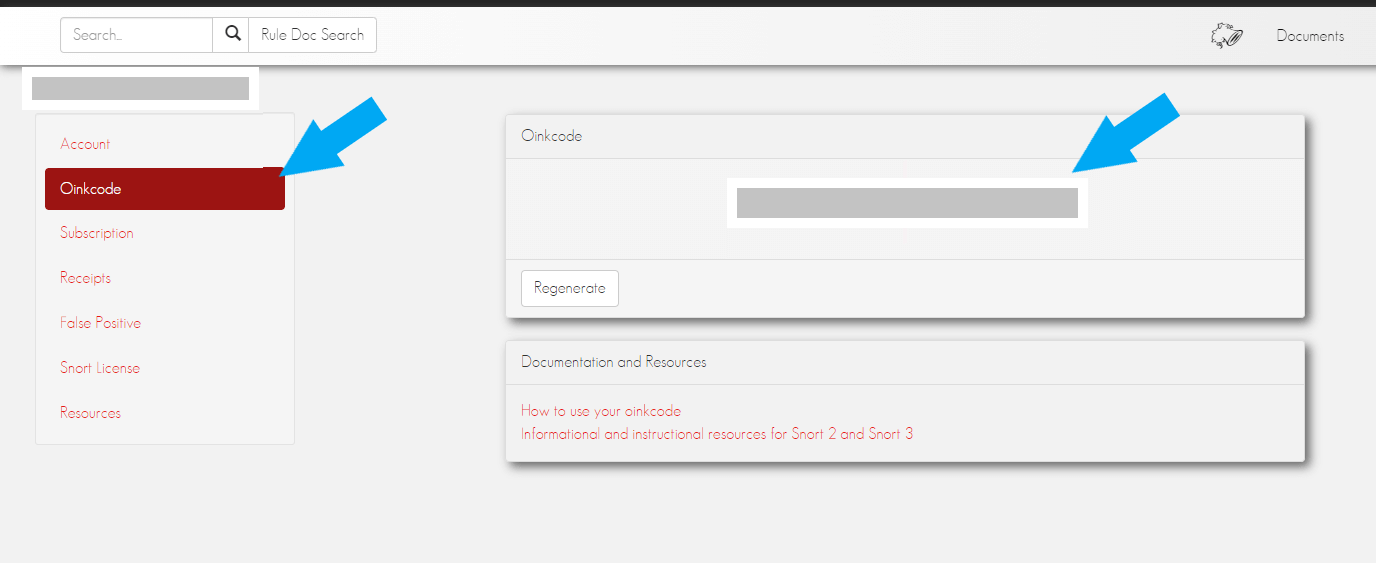
After creating your account on the Snort website, log in to your account. Click on Oinkcode, as shown in the screenshot below. Copy your Oinkcode and paste it into the Snort Oinkmaster Code field in Pfsense.
Scroll down to set up the rule Update Interval. Select based on your preference. I want the rule to be updated daily. Select 1 DAY and click the Save button.

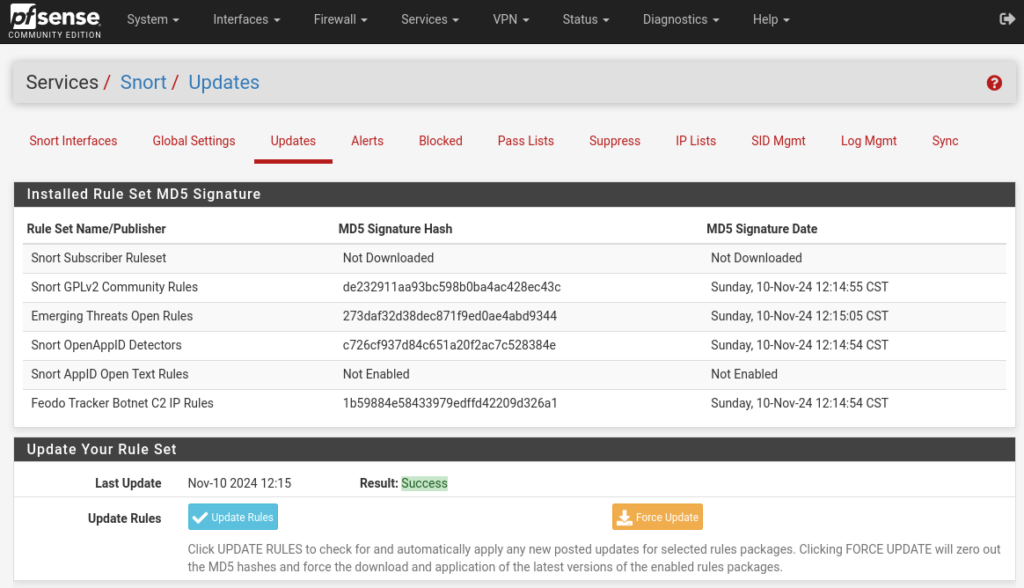
Next, click on Updates; you can update the rules by clicking on Update Rules. Ensure the Result says Success.

Create an Interface for Snort
Click on the Snort Interfaces tab and then click the + Add button.

Choose the network interface that you want Snort to monitor (for example, WAN or LAN). Check the Enable box to enable the interface. Give the interface a description and click save.

Configure the interface mode depending on your needs. Check the box for Resolve Flowbits and Use IPS Policy. For IPS Policy Selection, select Connectivity. Click Save to apply the changes.

Configure Snort Rules
Snort uses rule sets to detect malicious traffic. By default, Snort includes a variety of pre-configured rules, but you can customize these rules based on your network’s needs.
Click on WAN Rules and select IPS Policy – Connectivity for Category Selection.
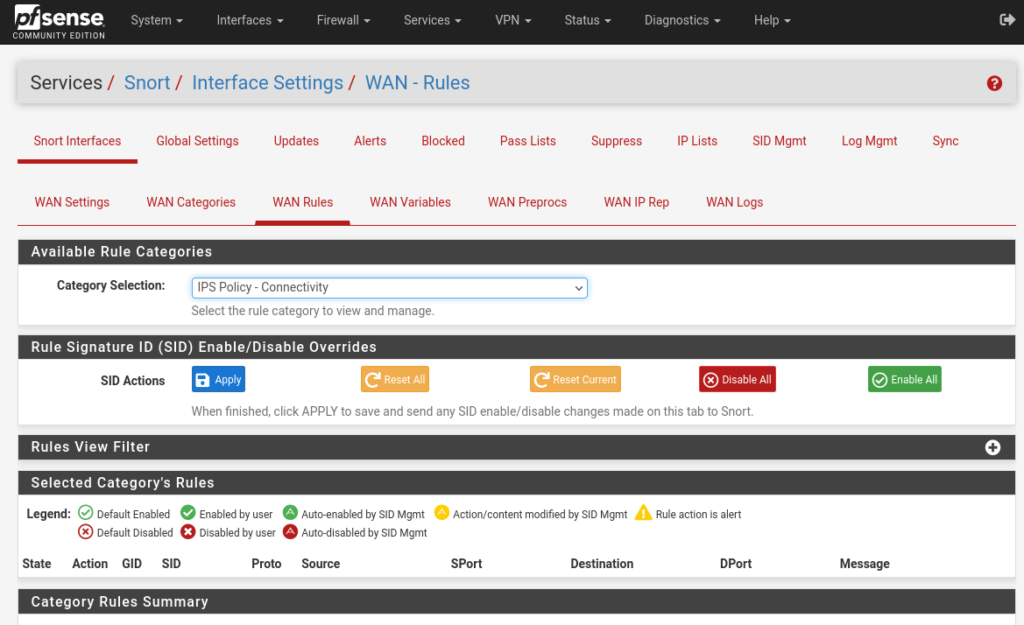
Scroll down and check the checkboxes next to the rules to enable as many rules as possible based on needs.
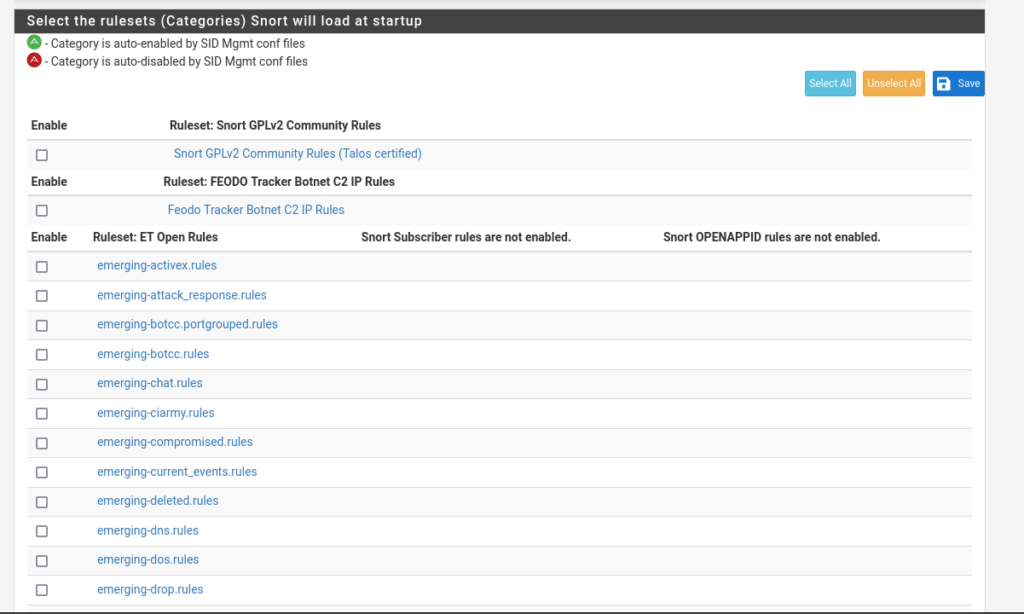
With Snort installed and configured, it’s time to enable the service and start monitoring your network traffic.
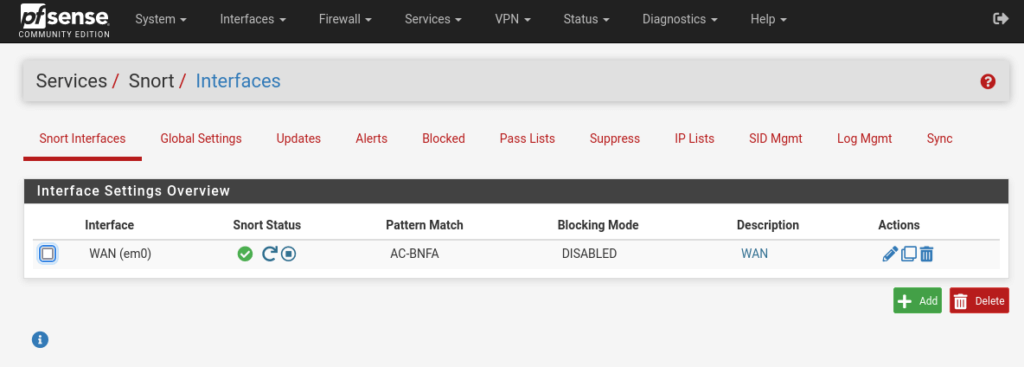
Go back to the Snort Interfaces page. Under the interface you created, click on the play icon, as shown in the screenshot below, to start Snort. Wait, it may take a few seconds.

The icon will change to a green mark once Snort has started.
Conclusion
Snort is a powerful tool to bolster the security of your pfSense firewall, providing real-time intrusion detection and prevention. By following this step-by-step guide, you can quickly install and configure Snort on pfSense to enhance your network’s security posture. Regular rule updates and monitoring of alerts will ensure your network stays protected from evolving threats.
Need help configuring Snort or other firewall tools on pfSense? Click here to contact me.
