Table Of Contents
Create a Sensitive Info Type for Medical Data in Microsoft Purview
In today’s world, protecting sensitive data is more important than ever, especially in the healthcare industry, where privacy is paramount. Microsoft Purview provides a powerful way to manage and safeguard sensitive information. In this blog post, I will walk you through the process of creating a Sensitive Info Type for medical data within Microsoft Purview, targeting medical keywords, and ensuring that you meet the regulatory requirements and keep patient data secure.
What is Microsoft Purview?
Microsoft Purview is a comprehensive data governance, compliance, and risk management solution that allows organizations to classify, protect, and manage their data across various environments. It helps identify sensitive information, such as Personally Identifiable Information (PII) and regulatory data and gives you the tools to apply data protection policies accordingly. Creating a Sensitive Info Type (SIT) for medical data in Microsoft Purview is one of the critical steps in ensuring healthcare organizations are compliant with data privacy standards like HIPAA (Health Insurance Portability and Accountability Act) or GDPR (General Data Protection Regulation).
Why Create a Sensitive Info Type for Medical Data?
Medical data includes sensitive personal information such as medical records, diagnoses, treatment information, and payment details. By creating a Sensitive Info Type specifically for medical data, you can:
- Classify sensitive medical data and prevent unauthorized access.
- Apply protective measures like encryption and access controls.
- Achieve compliance with regulations like HIPAA and GDPR.
- Improve data governance by easily tracking and auditing sensitive information.
Now, let’s dive into how to create a Sensitive Info Type for medical data in Microsoft Purview step by step.
Sign in to Microsoft Purview using your admin credentials. In the left-hand pane, click Solutions and click on Data Loss Prevention, as shown in the screenshot below.

Click on Classifiers > Sensitive info types > + Create sensitive info type.

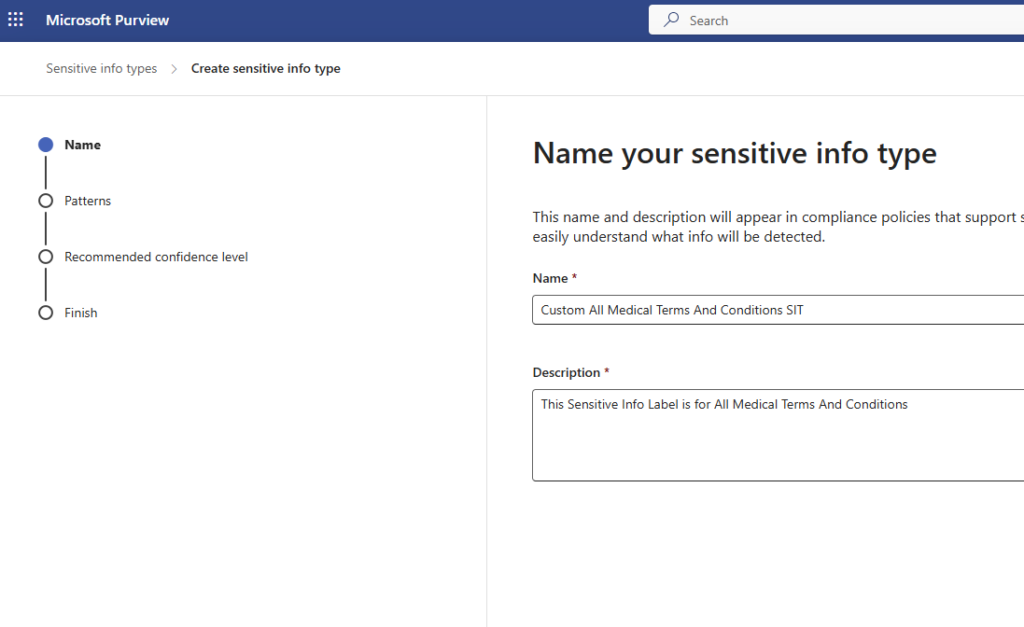
Give your Sensitive info type a descriptive name and a description so you can easily identify it later. Click on the Next button.

Click on +Create pattern to create a new sensitive info pattern.

Click on +Add primary element and choose Keyword list.

If you like, you can choose from existing keyword lists. But I will create a new list for this example. Enter an ID to identify your keyword list. Enter the keywords separated by a new line. It is case insensitive. Click Done.

Check the box next to Anywhere in the document to select it, as shown in the screenshot below. Click on Create and click on the Next button.

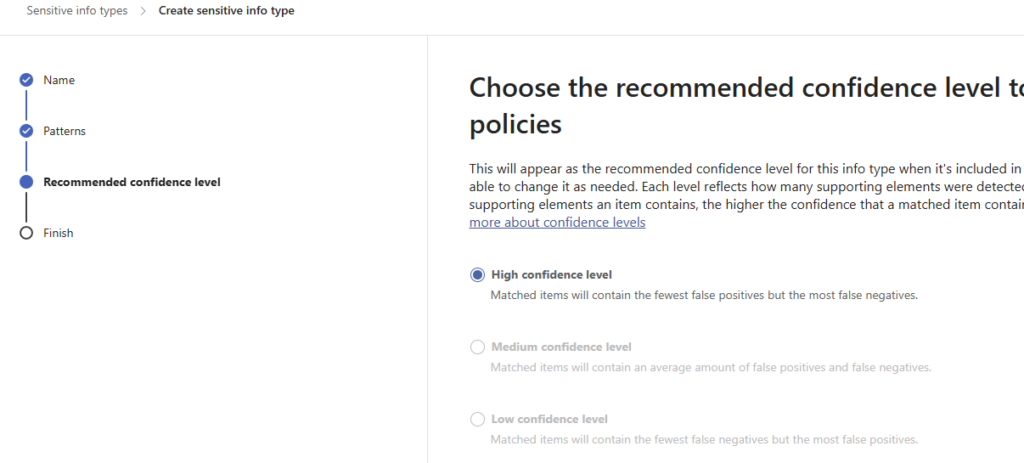
Choose a High confidence level for the recommended confidence level, and click on the Next button.

Review the settings of your Sensitivity info type and click on the Create button. Click on Done.

The Sensitive Info type for Medical data was created successfully, as shown below. Click here to learn how to create a DLP Policy using the Sensitive info type just created.

Best Practices for Creating Sensitive Info Types for Medical Data
- Regularly update detection patterns: Medical terminology and regulations evolve, so it’s essential to periodically update your detection rules and patterns.
- Limit access: Only authorized users should have access to sensitive medical data, and it’s best practice to apply least-privilege principles.
- Integrate with other compliance tools: Use Microsoft Purview alongside other compliance and security tools in your Microsoft 365 ecosystem for maximum protection.
- Keep an eye on compliance standards: Stay aligned with evolving healthcare regulations like HIPAA and GDPR to ensure you’re always compliant.
Conclusion
Creating a Sensitive Info Type for medical data in Microsoft Purview is an essential step in protecting sensitive healthcare information. By following this step-by-step guide, you can ensure that your organization is equipped with the tools to classify, protect, and monitor medical data effectively. Implementing strong data governance practices not only helps achieve compliance but also ensures that patient privacy is maintained at all times.
