Table Of Contents
- 1 What is Microsoft Purview DLP?
- 1.1 Key Benefits of Using DLP for Financial Information:
- 1.2 What are DLP Policies in Microsoft Purview?
- 1.3 How to Create DLP Policies in Microsoft Purview Manually
- 1.4 How to Create DLP Policies in Microsoft Purview Using Templates
- 1.5 How to Turn Data Loss Prevention DLP Policy on in Microsoft Purview
- 1.6 Test the Effectiveness of your DLP Policy
- 1.7 About The Author
Block Sharing of Financial Information Using DLP Policies in Microsoft Purview
In today’s digital landscape, ensuring the confidentiality and security of financial information is critical for organizations. Financial data such as credit card details, bank account numbers, transaction records, and other sensitive financial information must be protected from unauthorized access or accidental sharing. Microsoft Purview provides a robust solution for enforcing Data Loss Prevention (DLP) policies that block the sharing of financial information, ensuring compliance with regulations like PCI-DSS (Payment Card Industry Data Security Standard), and protecting the organization from potential financial data breaches. In this guide, I will walk you through the process of creating and configuring DLP policies in Microsoft Purview to block the sharing of sensitive financial information across Microsoft 365 applications like SharePoint, OneDrive, Teams, and Exchange.
What is Microsoft Purview DLP?
Data Loss Prevention (DLP) in Microsoft Purview is a security feature designed to help organizations detect, prevent, and manage the sharing of sensitive data. By setting up DLP policies, organizations can automatically enforce rules to protect sensitive information, including financial data, across Microsoft 365 services.
Key Benefits of Using DLP for Financial Information:
- Regulatory Compliance: Ensure compliance with financial data regulations such as PCI-DSS and GDPR.
- Data Security: Block unauthorized sharing of sensitive financial information.
- Risk Management: Mitigate the risk of financial fraud, data breaches, and leaks.
- Automation: Automatically detect and restrict access to sensitive financial data.
What are DLP Policies in Microsoft Purview?
DLP policies in Microsoft Purview allow organizations to identify, monitor, and protect sensitive data. With these policies in place, you can prevent the accidental sharing of confidential information, such as personally identifiable information (PII), credit card details, or corporate secrets. These policies help ensure compliance with legal and regulatory requirements, as well as improve internal data governance.
Microsoft Purview offers two primary ways to create DLP policies:
- Manually – Customizing the policy based on your organization’s specific needs.
- Using Templates – Leveraging pre-configured templates for common scenarios.
Let’s explore both methods in detail.
How to Create DLP Policies in Microsoft Purview Manually
Creating a DLP policy manually provides you with full control over the types of sensitive information you wish to protect, where that information is located, and how the policy should react to violations.
Sign in to Microsoft Purview using your admin credentials.
In the left-hand pane, click Solutions and click on Data Loss Prevention, as shown below.

Click on Policies in the top menu and select Create Policy.

Select Custom >Custom policy to create a manual DLP policy from scratch. Click on the Next button to proceed.

Enter a meaningful name for your policy. For example, let’s say you want to create a DLP policy to prevent the sharing of credit card information via email, Teams, or SharePoint. I will name my policy Custom Financial Data Protection Policy. Add a description to clarify the purpose of the policy. Click on the Next button.

Choose locations where you want the policy to apply, as shown below. Click on the Next button.

Choose Create or customize advanced DLP rules, as shown below. Click on the Next button.

Click on + Create rule

Enter a meaningful name for your rule. Add a description to clarify the purpose of the policy rule. Under Conditions, click on +Add condition.

Choose Content Contains, and give it a meaningful name as shown below. Click on +Add and select Sensitive Info types. Select your sensitive info type and click Add. For this example, I will select the sensitive info type created previously. Click here to learn how to create a Sensitive info type for financial data in Microsoft Purview. Click on the Next button.

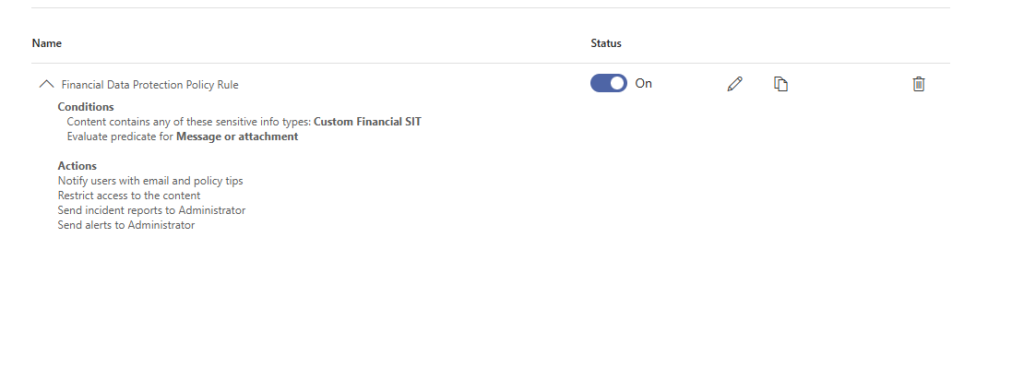
Your rule should look similar to the screenshot below.

Click on + Add an action and select Restrict access or encrypt the content in Microsoft 365 locations. Choose what should happen when the conditions are met. For this example, I will choose Block everyone, as shown below. Turn user notification on. Use notifications to inform the users and help educate them on the proper use of sensitive information. Select who will be notified based on your organization and click on the Save button.

Decide if you want your users to be able to override policy restrictions based on your organization’s needs.

Decide if you want to receive alerts when conditions are met and how often. Decide who the alert should go to and through what medium based on your organization’s needs, and click on the Save button.

The custom policy rule was created successfully and turned on. Click on the Next button.

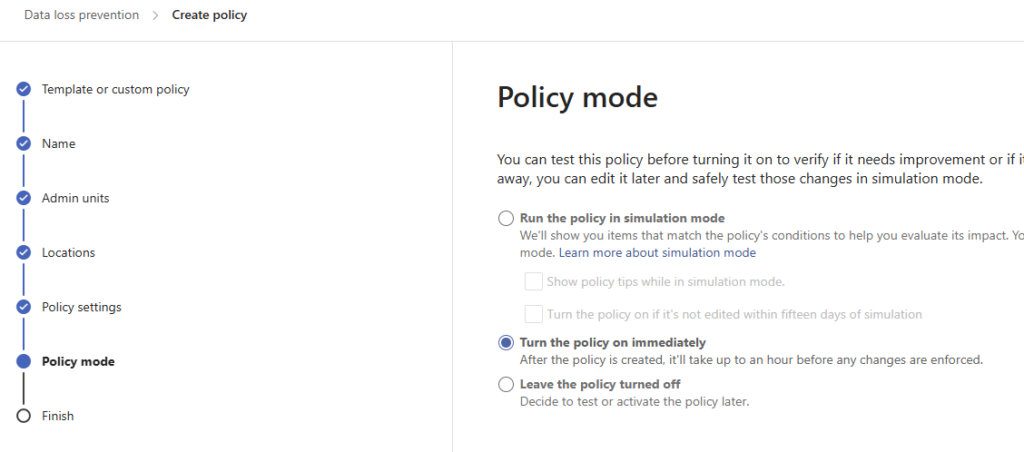
It is important to run the policy in simulation mode to test your policy before turning it on in a production environment. This is my lab tenant, so I will turn the policy on immediately for this example. If you want, you can select Run the policy in simulation mode to test it before turning it on. To learn how to turn the policy on later, scroll down to the next example where I will show the step-by-step.

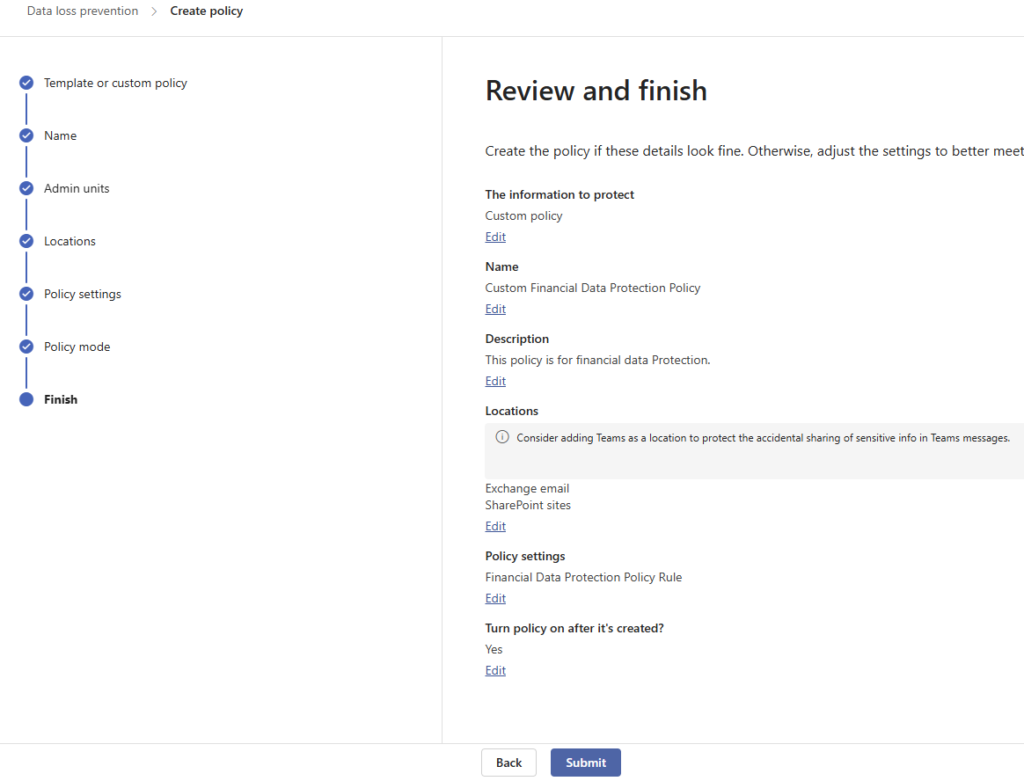
Review your policy and click on the Submit button.

The policy was created successfully as shown below.

How to Create DLP Policies in Microsoft Purview Using Templates
If you want to save time or if you are unsure how to start, Microsoft Purview provides pre-built DLP templates that can be applied with just a few clicks. These templates are designed for common data protection scenarios.
Go to Microsoft Purview and sign in with your admin credentials.
In the left-hand pane, click on Data Loss Prevention. Click on Policies in the top menu and select Create policy.

Under Categories, select based on the country where your business operate, type of data you are trying to protect and the regulation your company must comply with. For this example, The company operate in United States, I am trying to protect financial data in compliance with PCI Data Security Standard (PCI DSS). I will select United States of America for the country, Financial under the Categories section and PCI Data Security Standard (PCI DSS) under the Regulations.

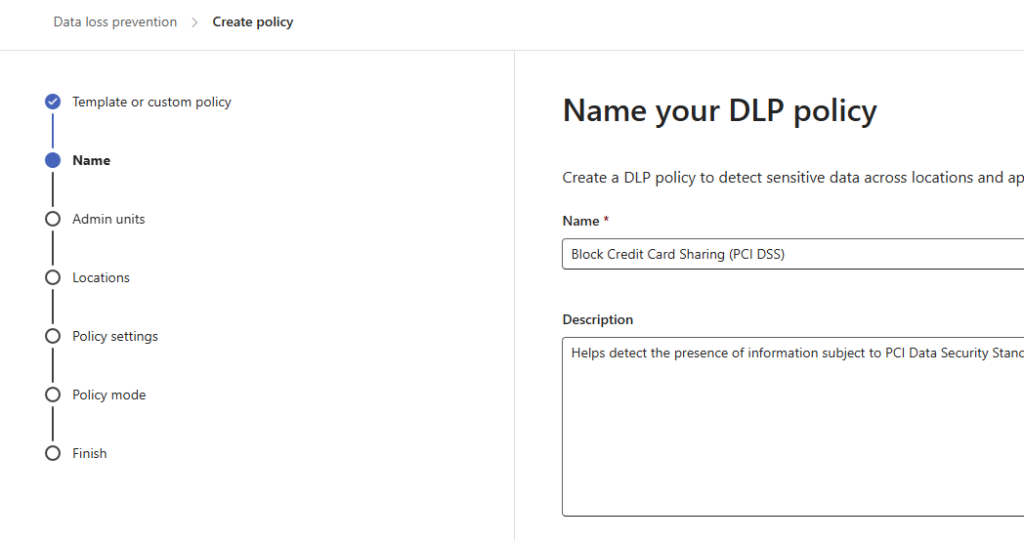
You can rename your policy or leave it as is.

If you like, you can select the admin units to assign the policy to. I will leave it as default for this example. Choose the locations where the policy should be applied. For this example, I will choose Exchange email, OneDrive accounts, SharePoint sites, Teams chat and channel messages, and Devices. You can apply the policy across all locations or specific ones, depending on your needs. Click on the Next button.

Select Review and customize default settings from the template. You can select the second option if you like to create or customize advanced DLP rules. Click on the Next button.

Here, you can click on edit and modify the information to protect. The goal of this simple policy is to protect credit card number so I will leave it as default for this example,

With Protection actions, you can specify what happens when there is a policy violation. You can choose to send a message to the user letting them know that their action violates the company policy. This can help users learn how to use sensitive information responsibly. You can leave the tip as default or customize it to the message you would like to pass. I will leave it as default for this example.

Based on your needs, you can set Detect when a specific amount of sensitive info is being shared at one time. The default is 10. For this example, I will set it to 5. You can choose to receive the report by email. You can also choose to receive alerts. I will leave the options as default. Click on the Next button.
You can customize access and override settings to align with your company’s requirements. Click the Next button.

You can customize access and override settings to align with your company’s requirements. Click the Next button.

Decide if you like to receive email incident report notification and specify it here.

It is always a good practice to test your policy before turning it on. Select Run the policy in simulation mode. Click on the Next button.

Review your policy and click on the Submit button.

How to Turn Data Loss Prevention DLP Policy on in Microsoft Purview
The policy was created successfully. Click on your policy and click on Edit policy as shown below.

Click on View Simulation.

Click on Turn the policy on.

Click on Confirm.

Test the Effectiveness of your DLP Policy
I will try to send emails, including some of the keywords, to both internal and external email addresses.
Testing with the internal user. The screenshot below shows the policy tip I received.

I tried to send the email anyway, and the email was blocked, as shown below.

Testing with the external email address. The screenshot below shows the policy tip I received.

I tried to send the email anyway, and the email was blocked, as shown below.

