Creating resources in Microsoft Azure is a fundamental skill for anyone working with cloud computing. Azure offers various services and tools, making it a powerful platform for building, managing, and deploying applications. In this post, I will walk you through the essential steps to create resources in Azure, whether you’re a beginner or looking to refresh your skills.
Table Of Contents
Understanding Azure Resource Groups
Azure organizes resources using Resource Groups. A Resource Group in Azure is a container that holds related resources for an Azure solution. Think of it as a way to manage and organize your resources efficiently.
Getting Started with Azure
Before you can create resources, you need an Azure account. If you don’t have one, follow these steps:
Click here to go to the Azure website and create a free account. Click here to access the Azure Portal at portal.azure.com. This is your central hub for managing all Azure resources.
Create a Resource Group:
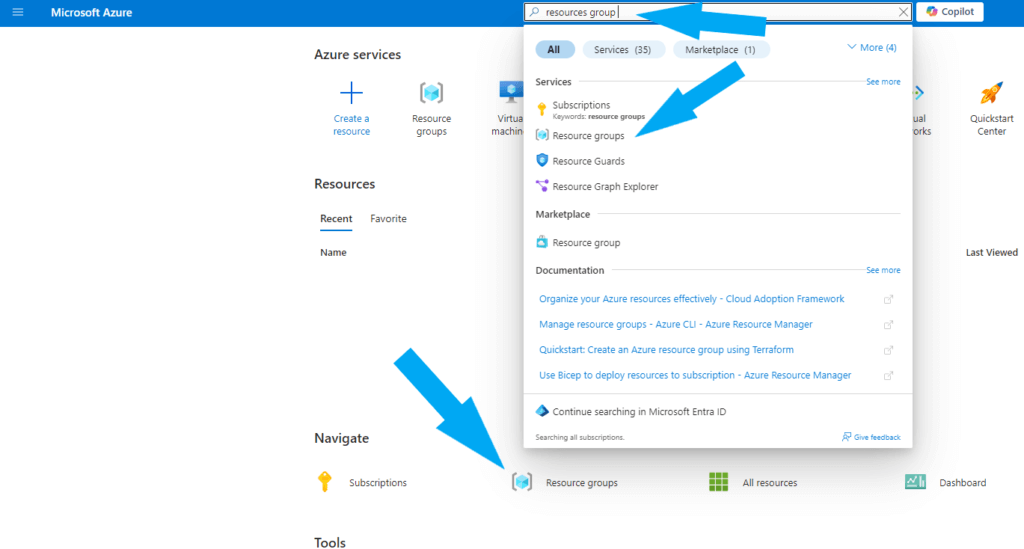
In the Azure Portal, navigate to Resource Groups by clicking on the Resources Groups icon or by typing “Resources group” into the search bar and clicking on it.
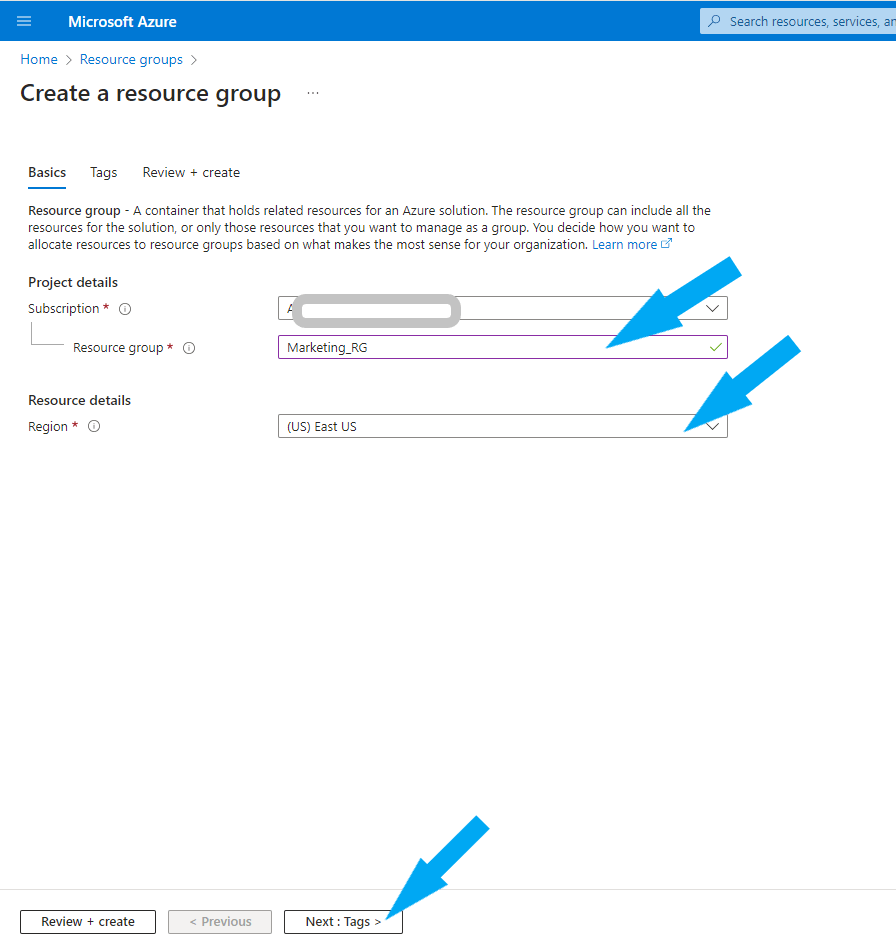
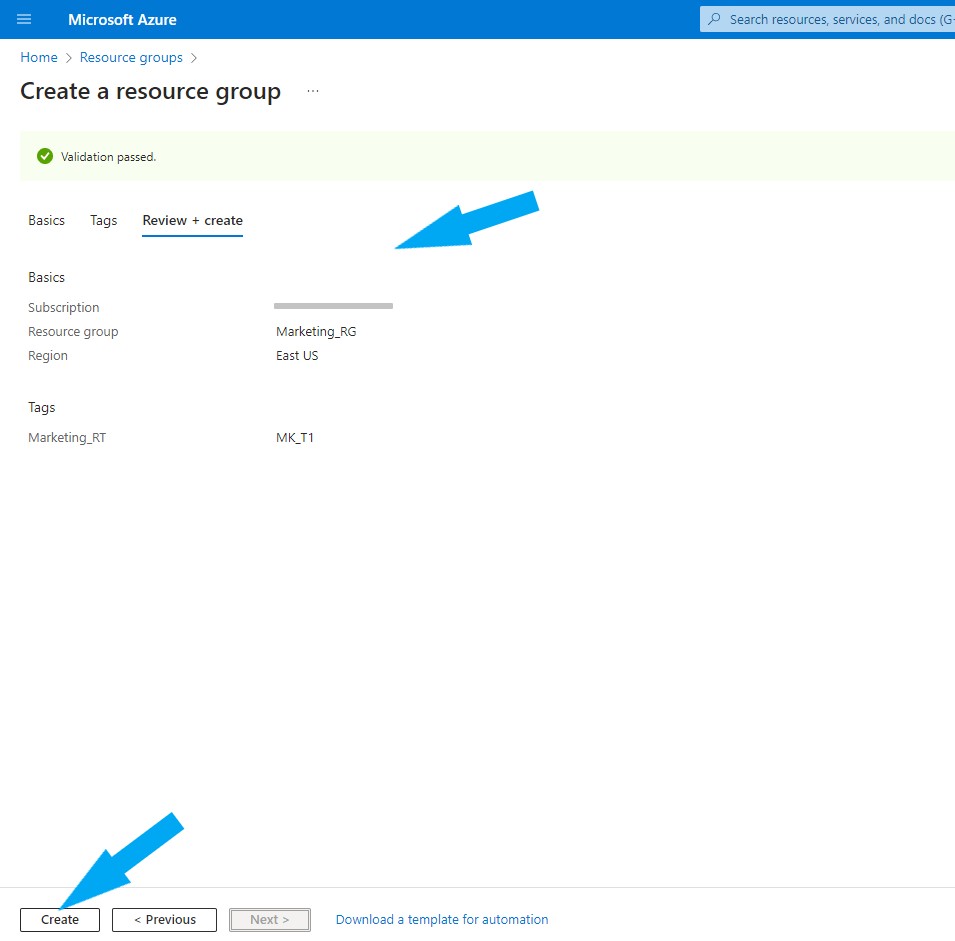
Click Create and enter a name for your Resource group. Select a region, and click the Next: Tags button at the bottom.
Tags in Azure are essential for organizing and managing resources within your Azure subscription. They offer a flexible way to categorize and identify resources, making them crucial for effective resource management. Tags allow you to categorize resources in a Resource Group based on various attributes such as environment (development, staging, production), department (marketing, finance), or project. This organizational structure helps you quickly locate and manage resources based on these categories.
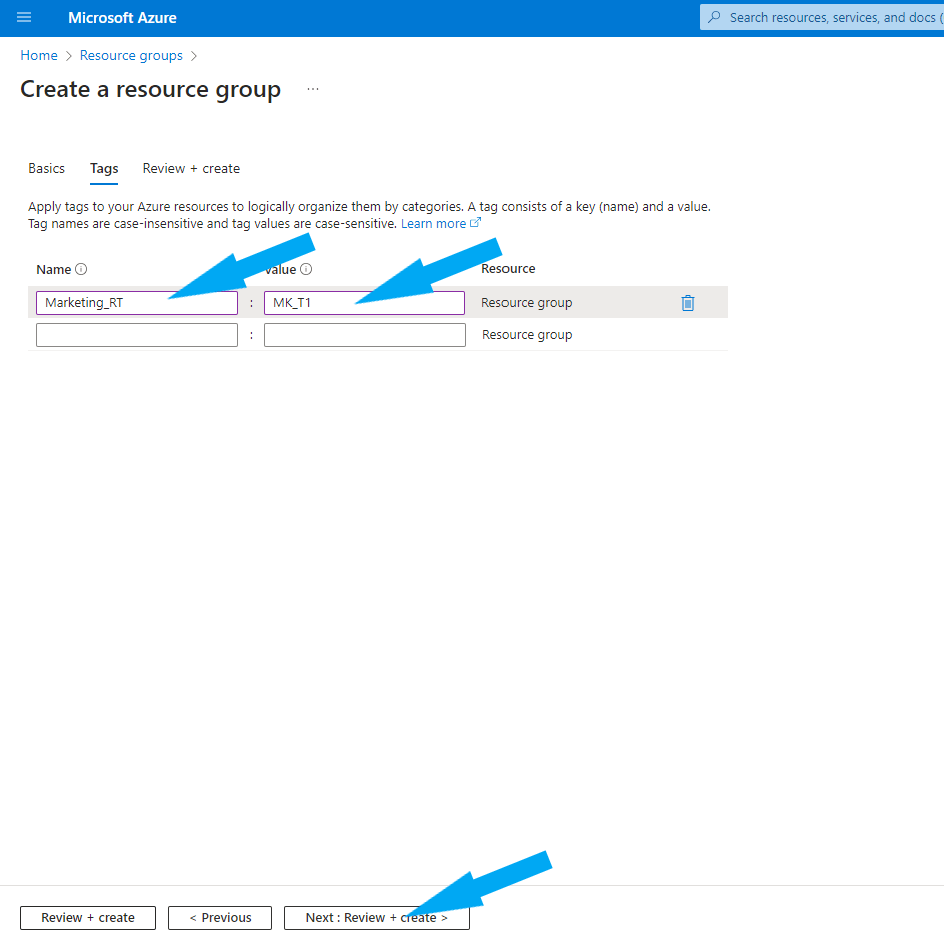
For this example, I will name the marketing resources tag with Marketing_RT to identify all resources related to the marketing department easily.
Name your tag and give it a value, then click the Next: Review + Create button at the bottom.
The Resources group has been successfully created, as shown in the screenshot below.

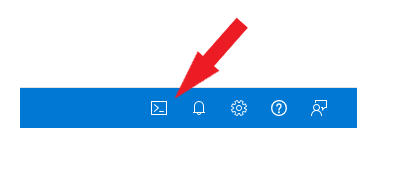
How to Create Resources Group Using Azure Command-Line Interface (CLI)
Open your Cloud Shell at the top right, as shown in the screenshot below, and choose Powershell.
Run the following command:
New-AzResourceGroup -Name <ResourceGroupName> -Location <Region>Replace “<ResourceGroupName>” and “<Region>” as shown in this example: New-AzResourceGroup -Name VulnMgmtRG1 -Location EastUS.

The new Resources Group was created successfully, as shown in the screenshot below.
