What is Non-Domain (Local) Scanning?
Non-Domain (Local) Scanning: This is when authentication scans are performed on local systems not joined to a domain.
In your Qualys VMDR account, click the drop-down arrow at the top left and select VMDR.
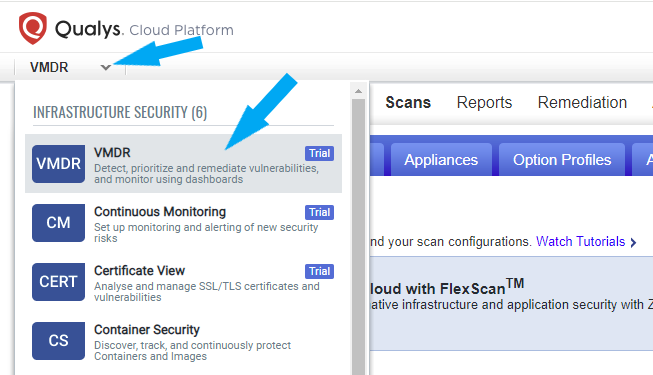
First, we will create an Option Profile for the Non-Domain (Local) Scanning. Click on the scans tab >Option Profiles > Click the New button > Option Profile. Click on Option Profile Title and give your Option Profile a Title. Leave everything else as default and click the Save button.

Next, Let’s create a new Authentication. Click on the scans tab > Authentication. Click the New button > Operating Systems > Windows.

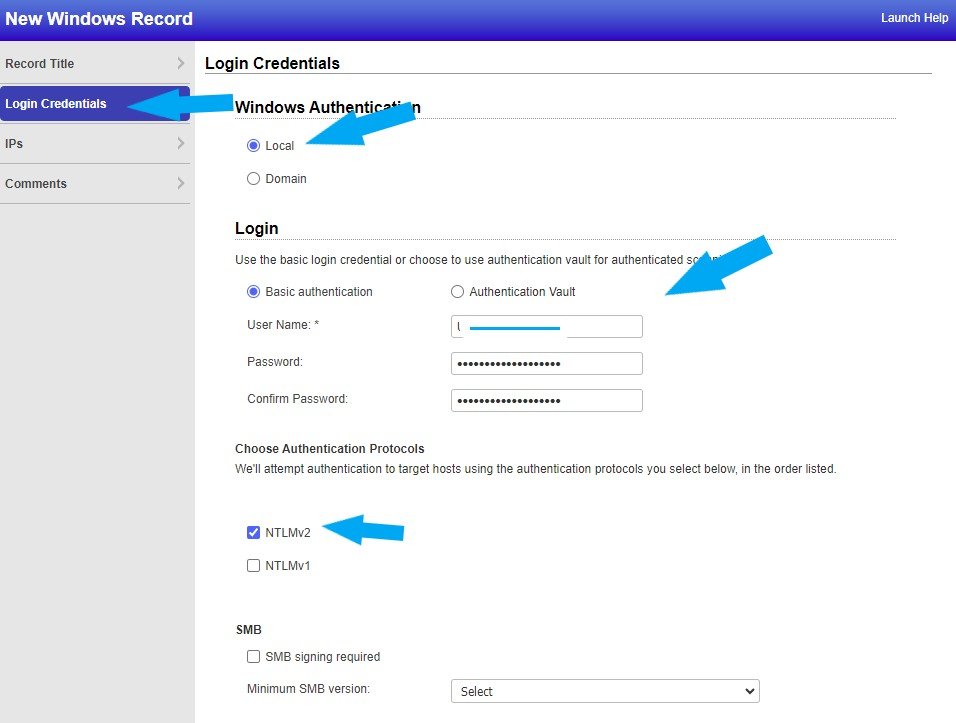
Click on Record Title on the left and give your authentication account a Title.

Click on the Login Credentials > Local, and create your username and password. Using the logging credentials of your target machine. The default authentication protocol in NTLMv2. Leave the authentication protocols as default.
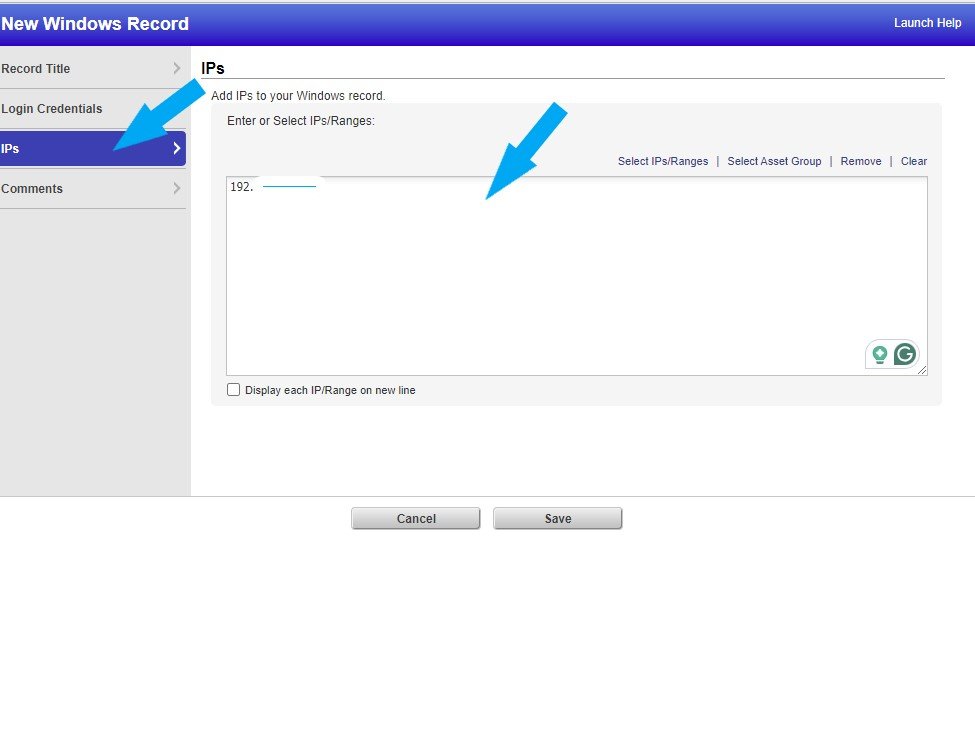
Click on the IPs by the left as shown in the screenshot below. Enter your IP address(es) or IP address range. Click on comments type your comment (Optional) and click the Save button.
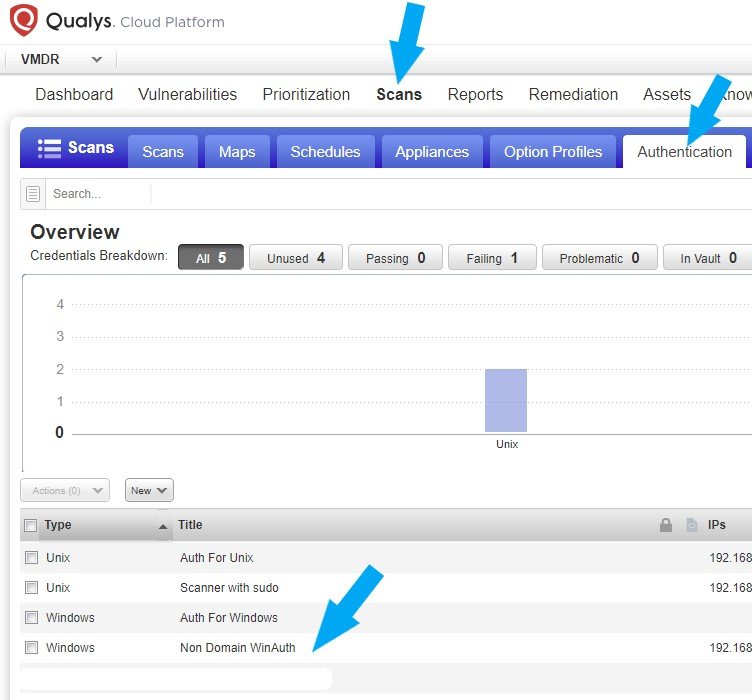
To check your newly created Windows Authentication, Click on the scans tab > Authentication.
Now, we will log into our target machine and perform the following according to Qualys Documentation:
- Enable File Sharing
- Turn firewall off
- Enable Remote Registry Service
- Configure User Access Control (UAC)
How to enable file sharing in Windows 10
Click on the network icon at the lower right of your screen. Click on Network & Internet settings highlighted in blue.
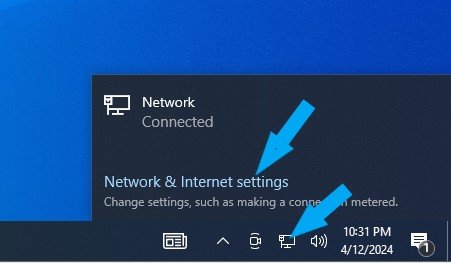
Click Network and Sharing Center. Click the Change Advanced Sharing Settings link on the left.

Click the Change Advanced Sharing Settings link on the left.

Under Guest or Public (Current Profile), turn on network discovery and turn on file and printer sharing. As shown below, click on the Save changes button.

Ensure these settings are correct. For All Networks, turn off Public Folder Sharing and turn on Password Protected Sharing.

Next, we are going to turn the Windows firewall off.
How to turn Windows Defender off
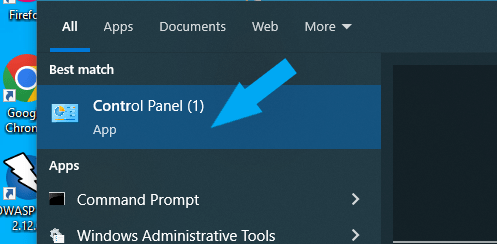
In the search box, type Control Panel.

Then click Control Panel.
To easily locate Windows Defender Firewall, change your “view by” on the top right to small icons.
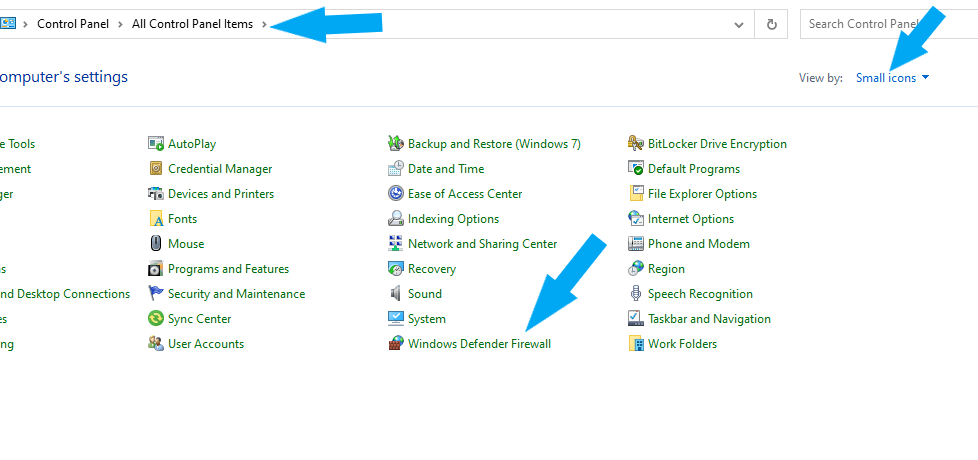
Click Windows Defender Firewall > Turn Windows Defender Firewall on or off

Check the radio button next to Turn off Windows Defender Firewall (not recommended) under Domain network Settings. Check the radio button next to Turn off Windows Defender Firewall (not recommended) under Private network Settings. Check the radio button next to Turn off Windows Defender Firewall (not recommended) under Public network Settings. Then click the OK button to save the changes.
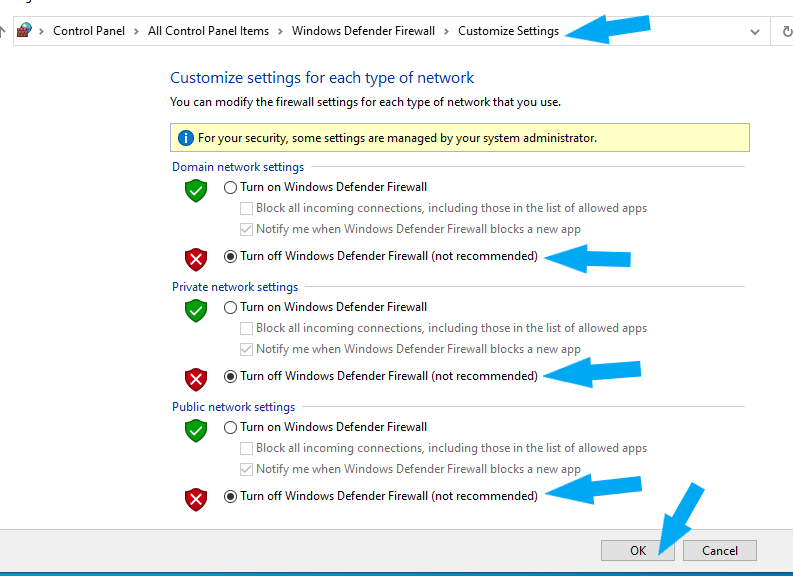
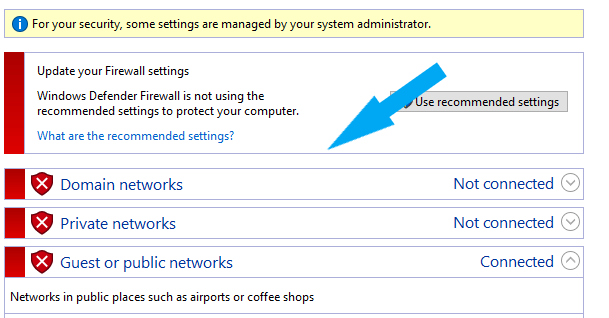
Windows Defender Firewall is successfully turned off your screen should look similar to the screenshot below.
Click here to learn about Windows Defender.
Let’s Enable Remote Registry Service
How to Enable Remote Registry Service in Windows 10
In the search box, type Service.

Click on services

Look for Remote Registry. and right-click on it.

Click on Properties, and change Startup Type from Manual to Automatic to start automatically at reboot. Click Apply and click OK.

Finally, let’s configure User Access Control (UAC). We need to disable User Access Control (UAC.
How to disable User Access Control (UAC) in Windows 10
Log in to your Windows 10 as an administrator. In the search box, type Contol Panel.

Click on Contol Panel. Change the view by: to small icons on the top right for easy access.

Click on User Accounts.

Click Change User Account Control Settings.

Move the slider down to Never Notify. And click OK.

Click Yes on the User Account Control prompt. Restart the machine for the changes to take effect.

How to Change Remote UAC Settings
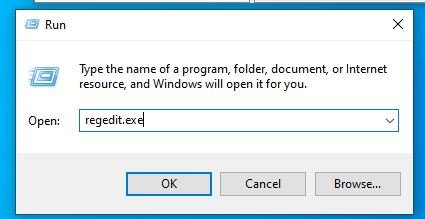
Launch Registry Editor by typing run in the search box as shown below.

Open type regedit.exe and click the OK button to open it. You may need to run it in administrator mode to perform this action.
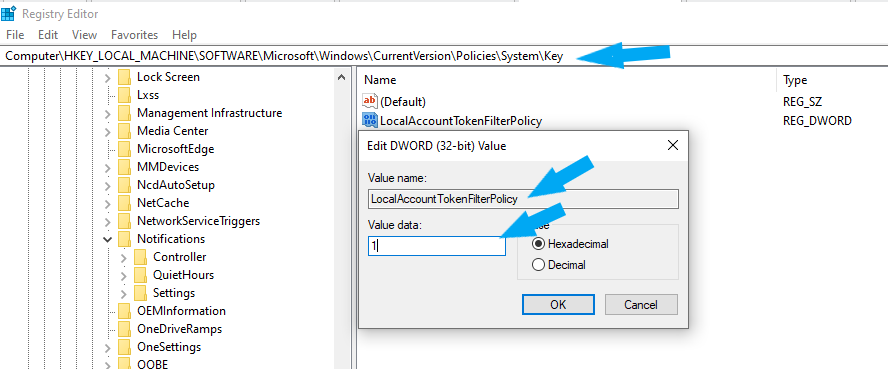
- Navigate to HKEY_LOCAL_MACHINE hive.
- Open SOFTWARE\Microsoft\Windows\CurrentVersion\Policies\System key.
- Create a new DWORD (32-bit) value with the following properties: Name: LocalAccountTokenFilterPolicy
Value: 1 as shown below. - Click the OK button to close the Registry Editor.
In the next lab, we will use the newly created Windows Non-Domain Authentication to perform an Authentication scan on a target host. Click here for the next lab
References
https://cdn2.qualys.com/docs/qualys-authenticated-scanning-windows.pdf

